
Since I started a desk job a few months back, my back had been hurting from sitting in one position for too long. The internet presented an Arched Back Stretcher to me. It was exactly what I had been looking for. I wanted to practice safe backbends without having to come into wheel or camel more than necessary.
What is the Arched Back Stretcher?
An arched back stretcher is a rainbow-shaped tool (see images below) that helps to stretch out your mid-section and spine. The stretcher is usually placed on the floor and the body is placed on top the stretcher to target tight or sore spots on the body. Within minutes I was relaxing in a backbend and feeling fully supported by the stretcher.
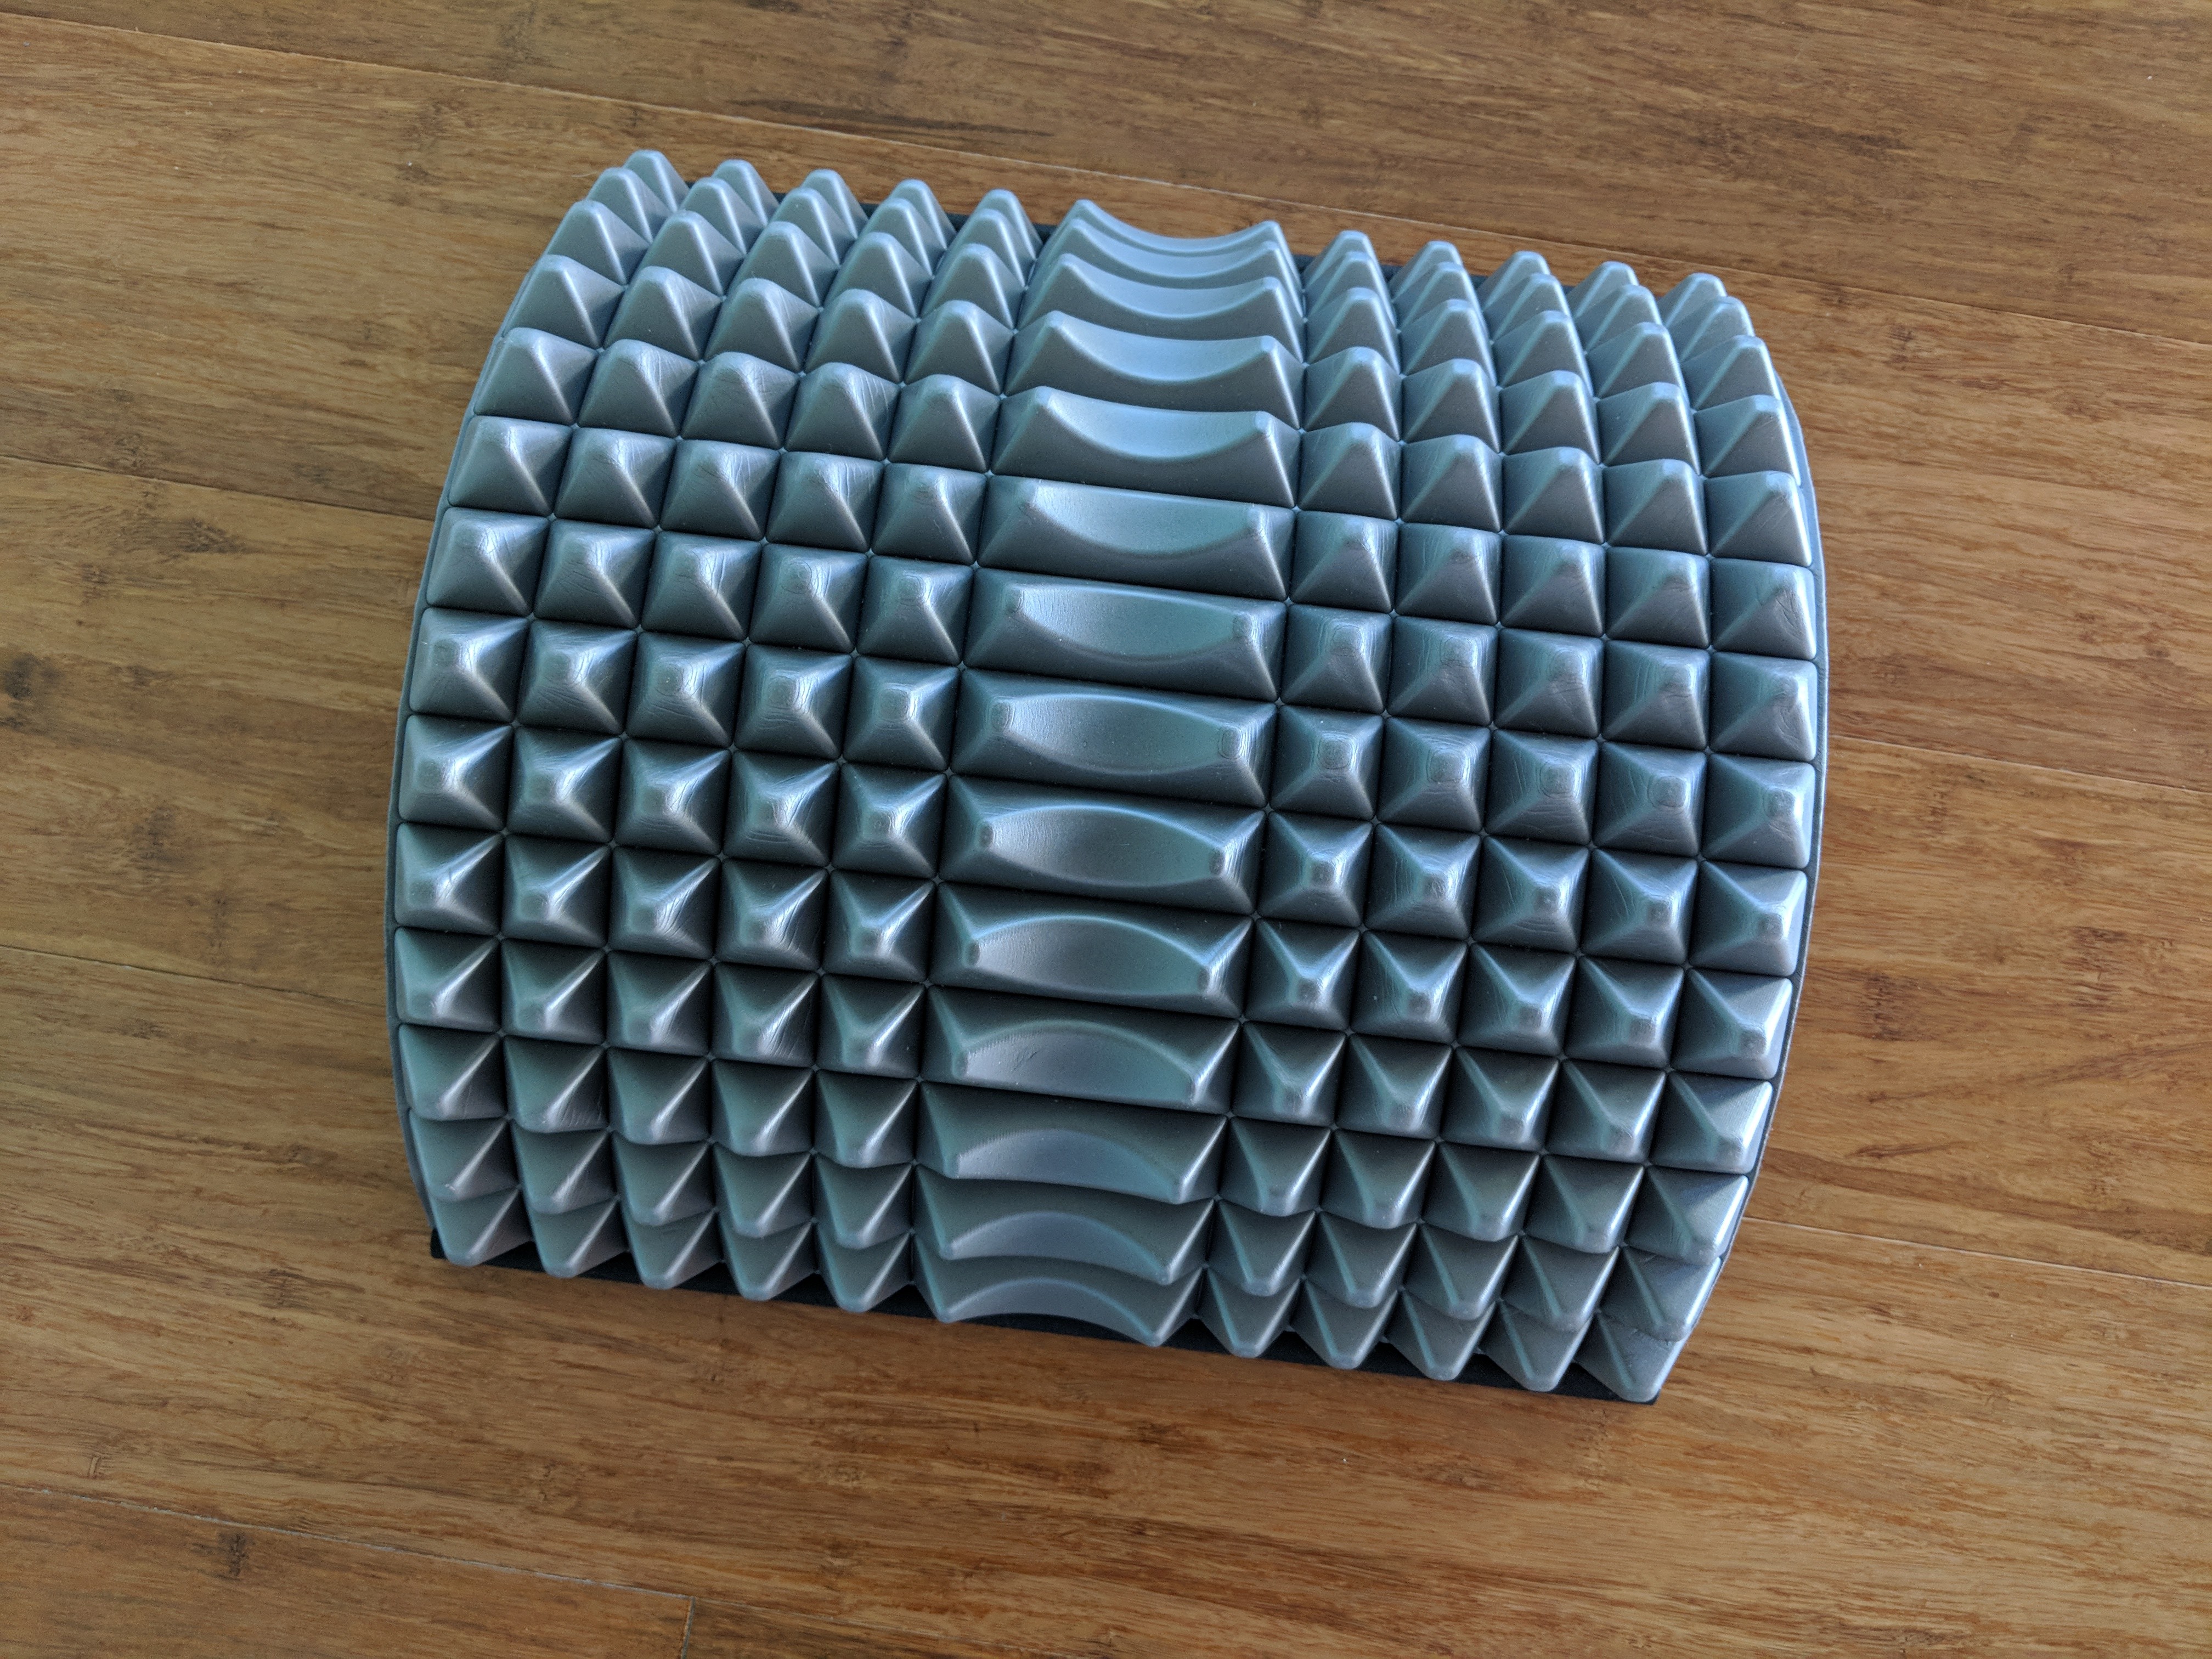

Top View
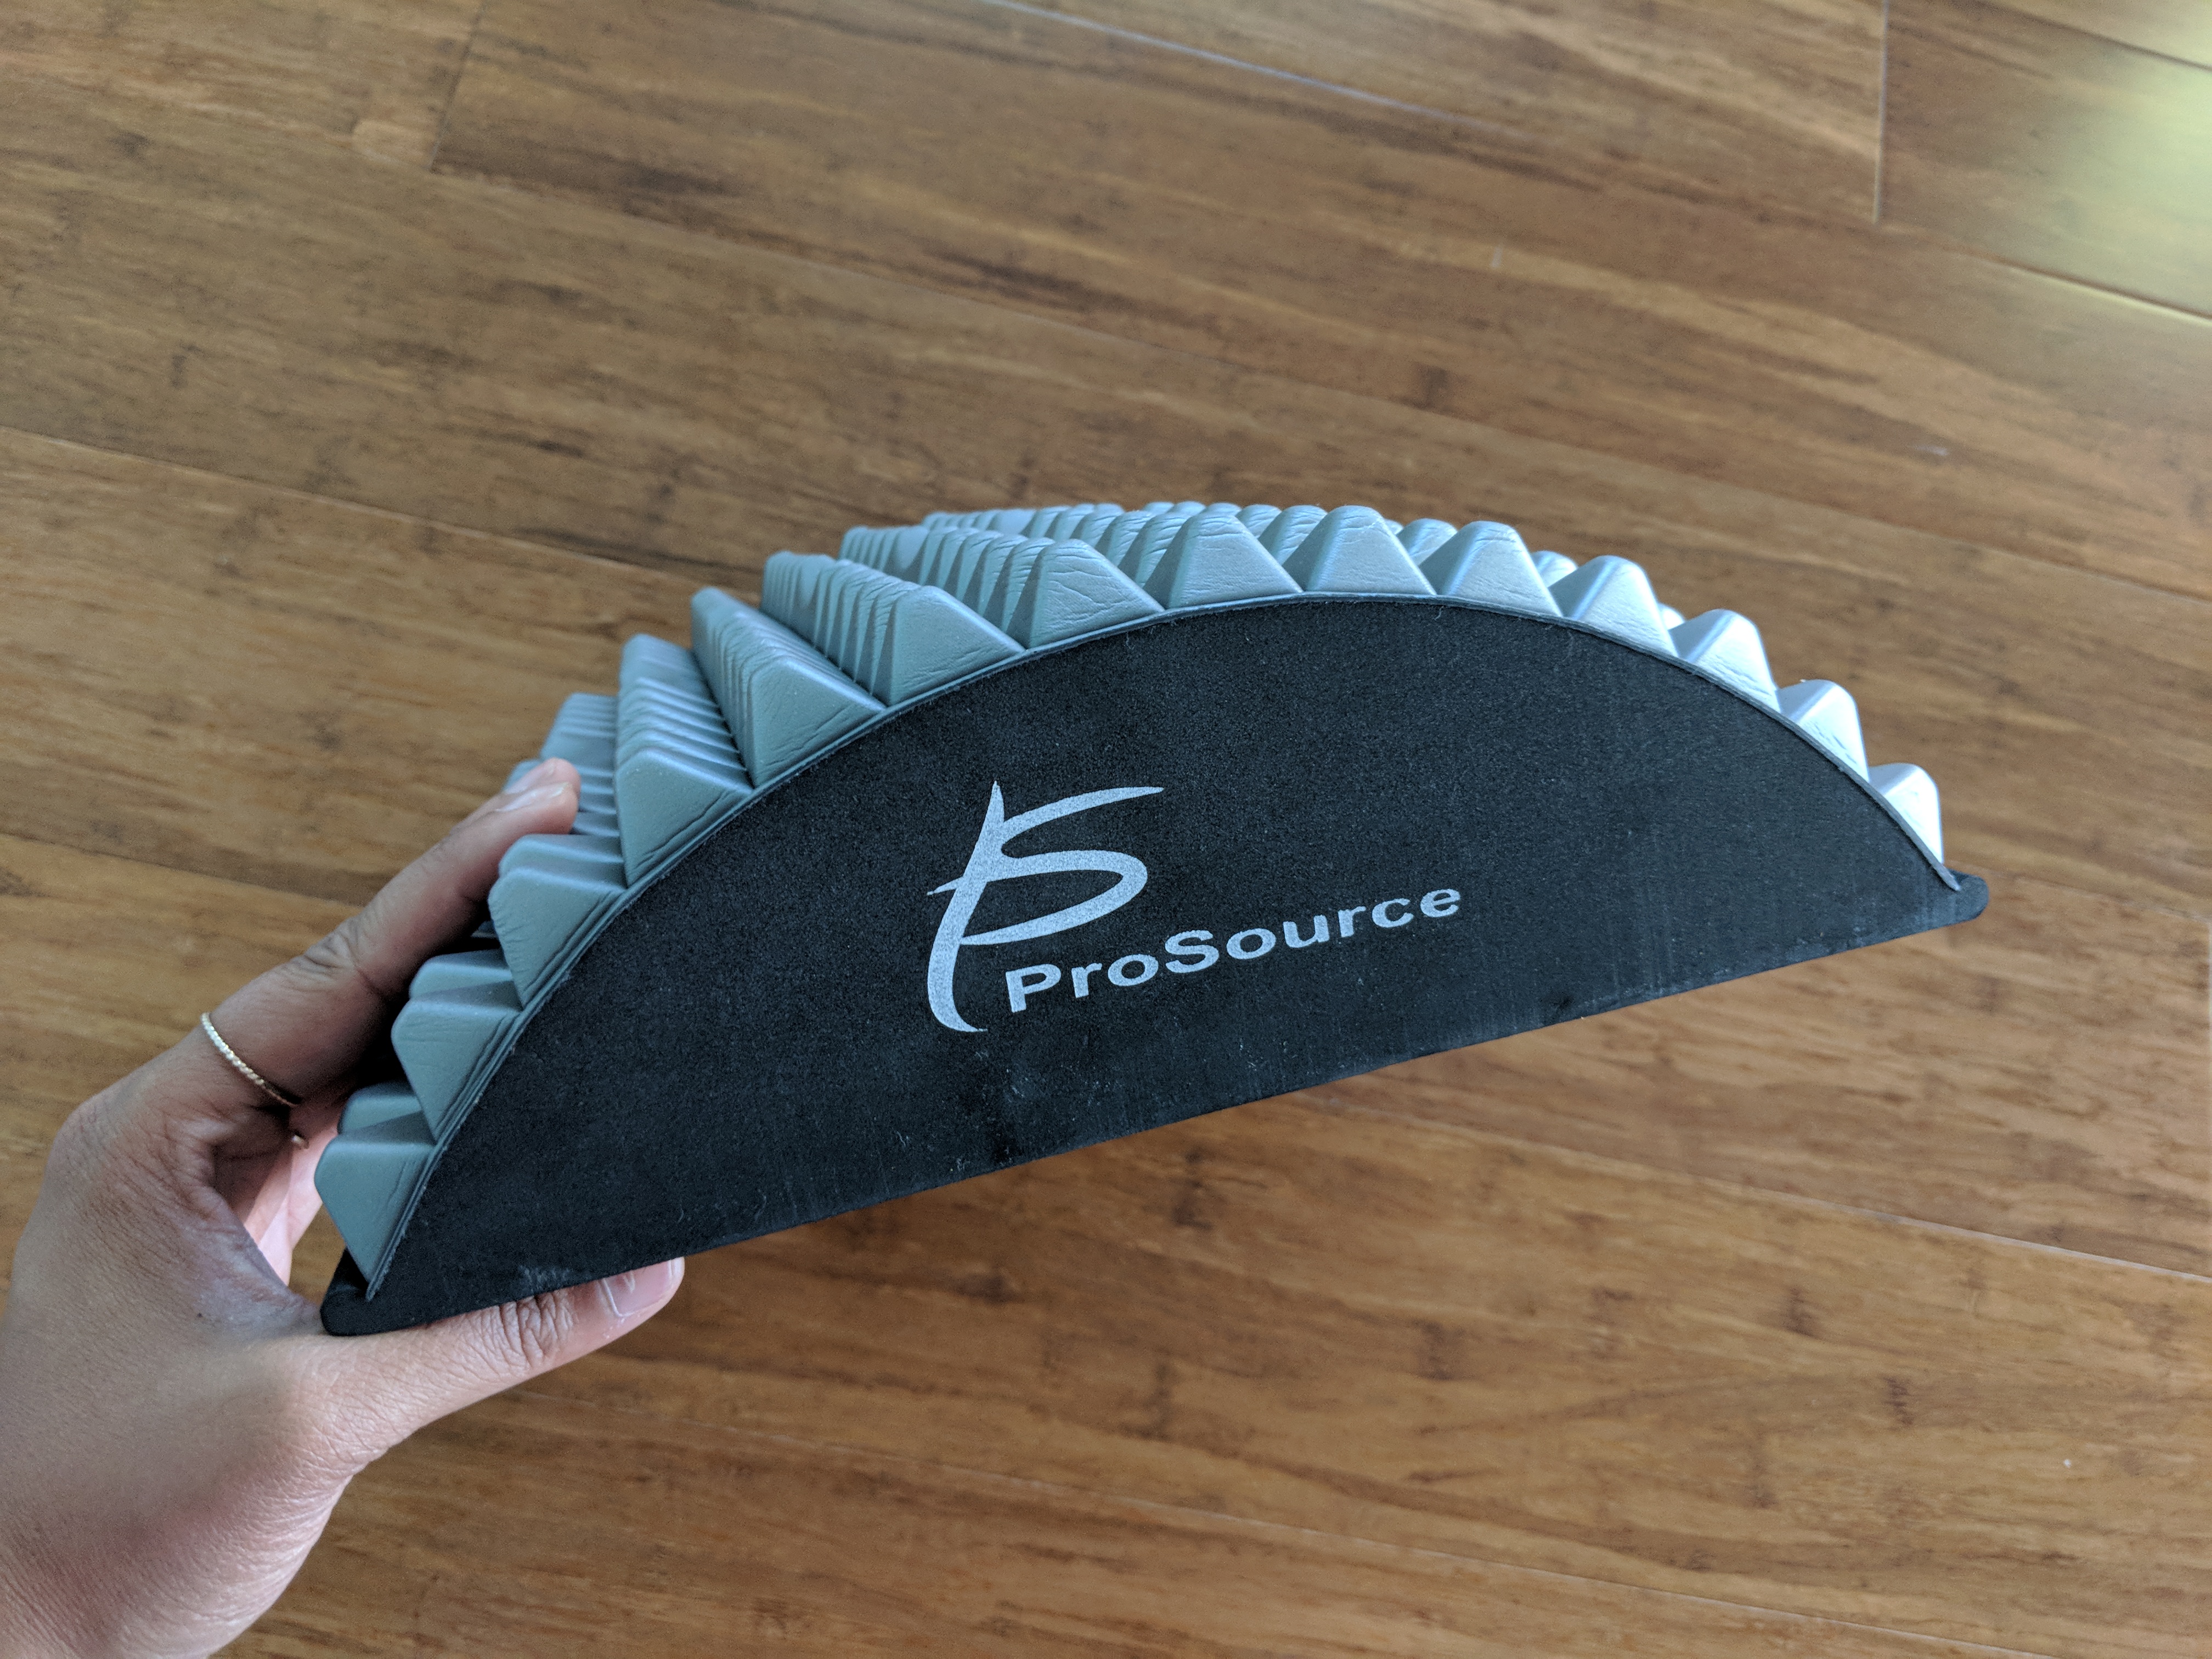
 Side View
Who does the Arched Back Stretcher benefit?
Anyone and everyone. We all deal with stress from work, daily life, exercise, relationships, etc., this in turn causes pain and discomfort throughout our bodies and mainly in our backs. This tool is inexpensive yet easy to use. The benefits of the product are endless.
This simple piece of therapy equipment can be used anywhere to relieve lower back pain in just a few minutes. I have also been using it on other parts of my body during and beyond yoga.
I created a quick tutorial on how to use an arched back stretcher. I hope it benefits you as much as it does for me.
How to Use Arched Back Stretcher
#1 Reclined on Back

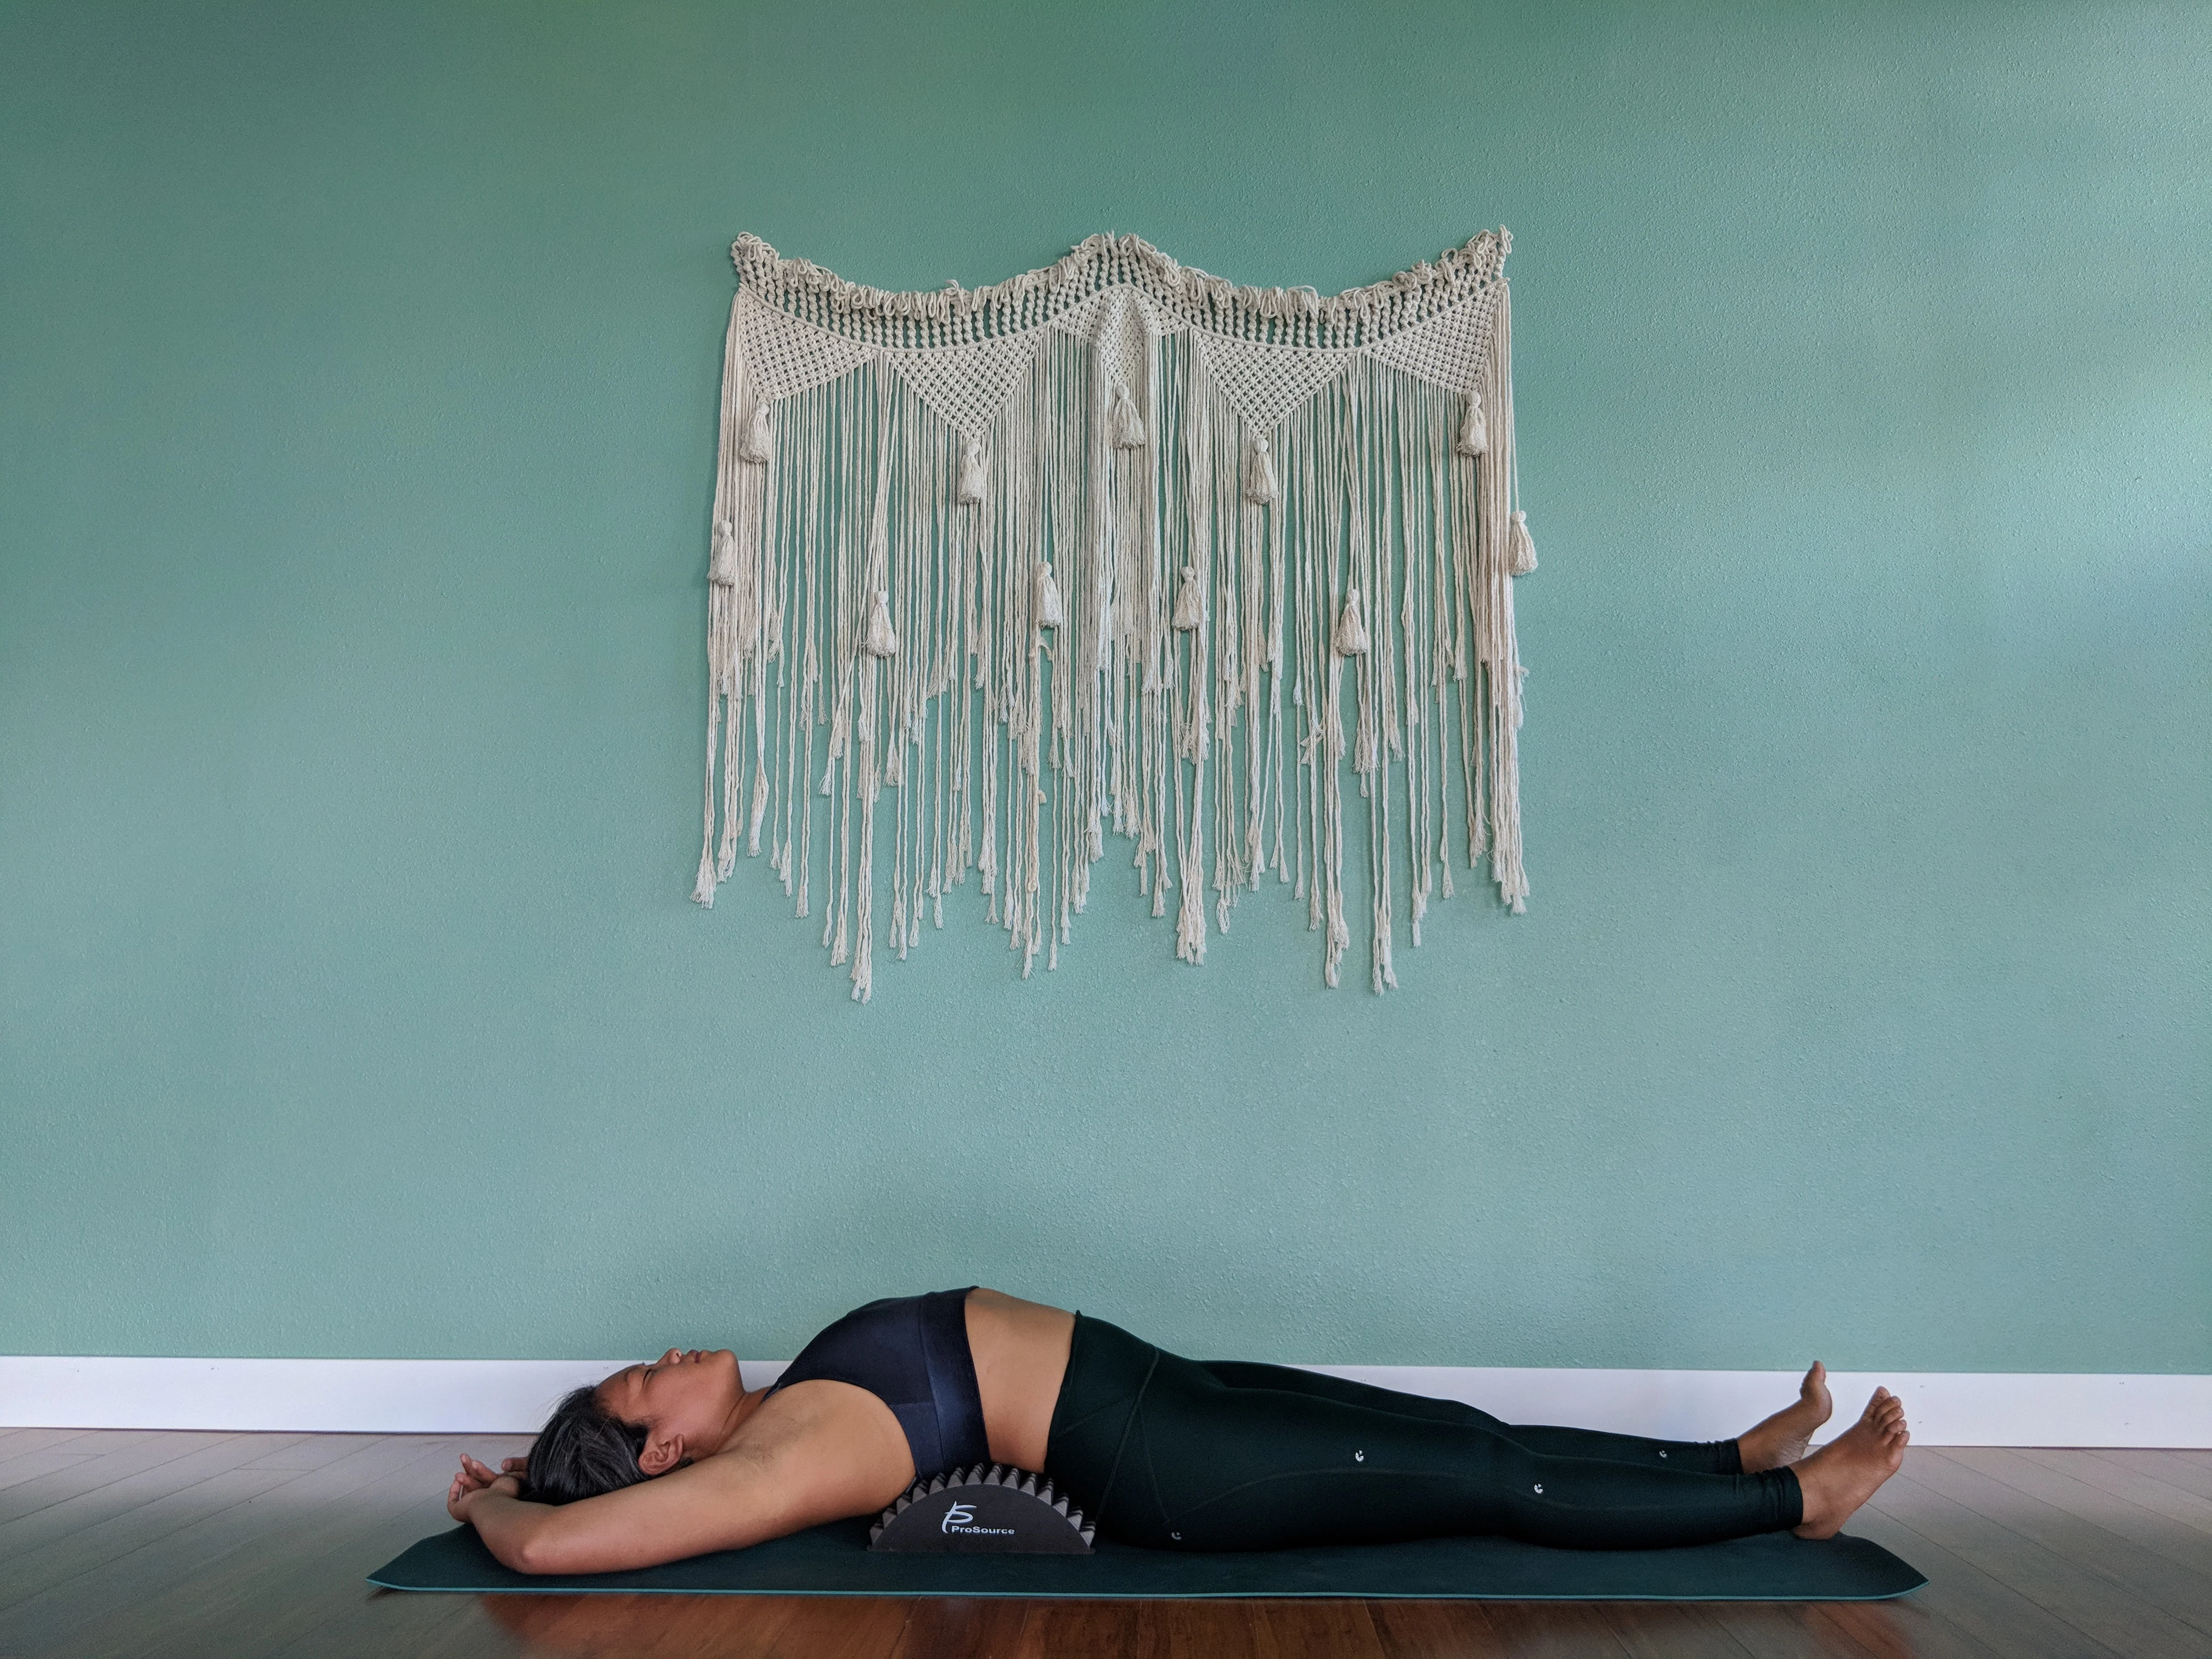
Reclined on stretcher with legs extended. Bring arms overhead to stretch shoulders and chest.


Reclined on stretcher with legs bent to support a tight lower back.
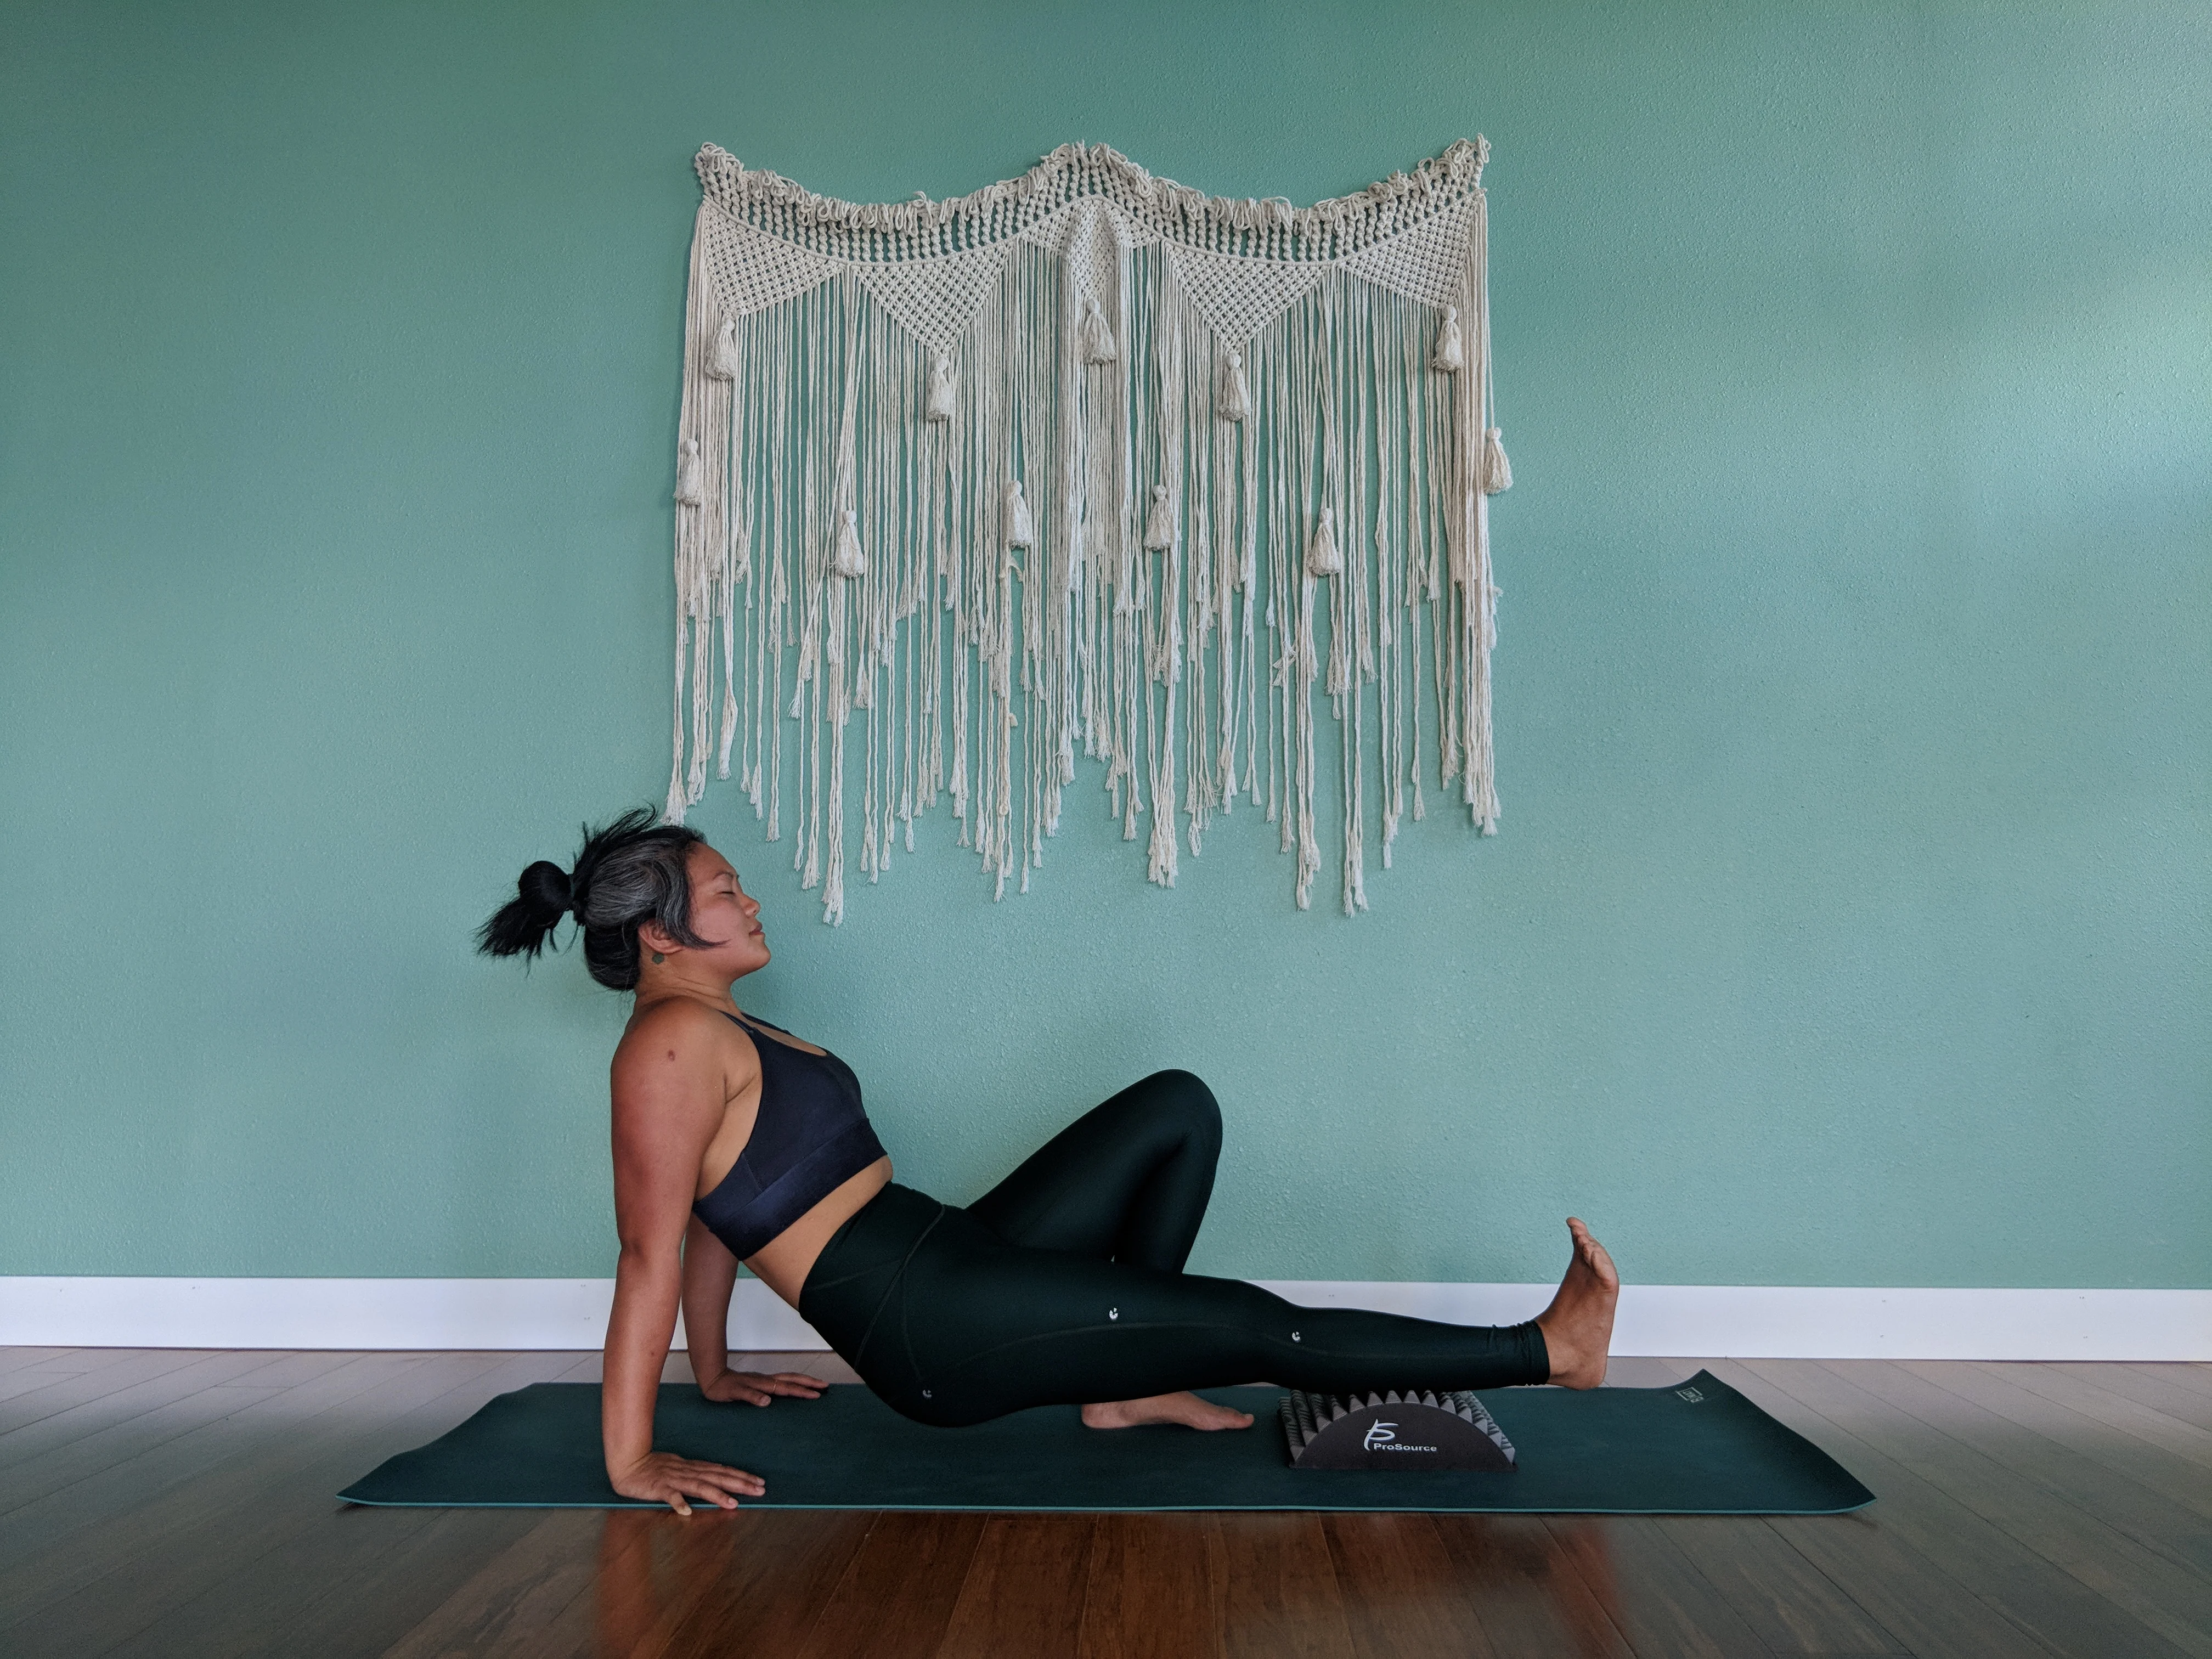
Place the stretcher on the ground in the middle of your mat. Sit on your mat with the tailbone touching one end of the stretcher. Begin to lay your vertebrae down onto the stretcher slowly. Once the spine is on the stretcher, lengthen your legs and allow the stretcher to gently open up your chest, back, shoulders and low back. Your arms can descend by your side or towards the back of the mat. Modify: If it is too much pressure on the low back, bend the needs and bring the feet close to your glutes to alleviate pressure on the low back. Stay here for 20 breaths.
Pro Tip: I love getting into this pose in the morning before work and then right before bedtime. I feel more relaxed. Try it out and let me know if it affects your workday or sleep quality.
#2 Seated Forward Fold (Paschimottanasana)
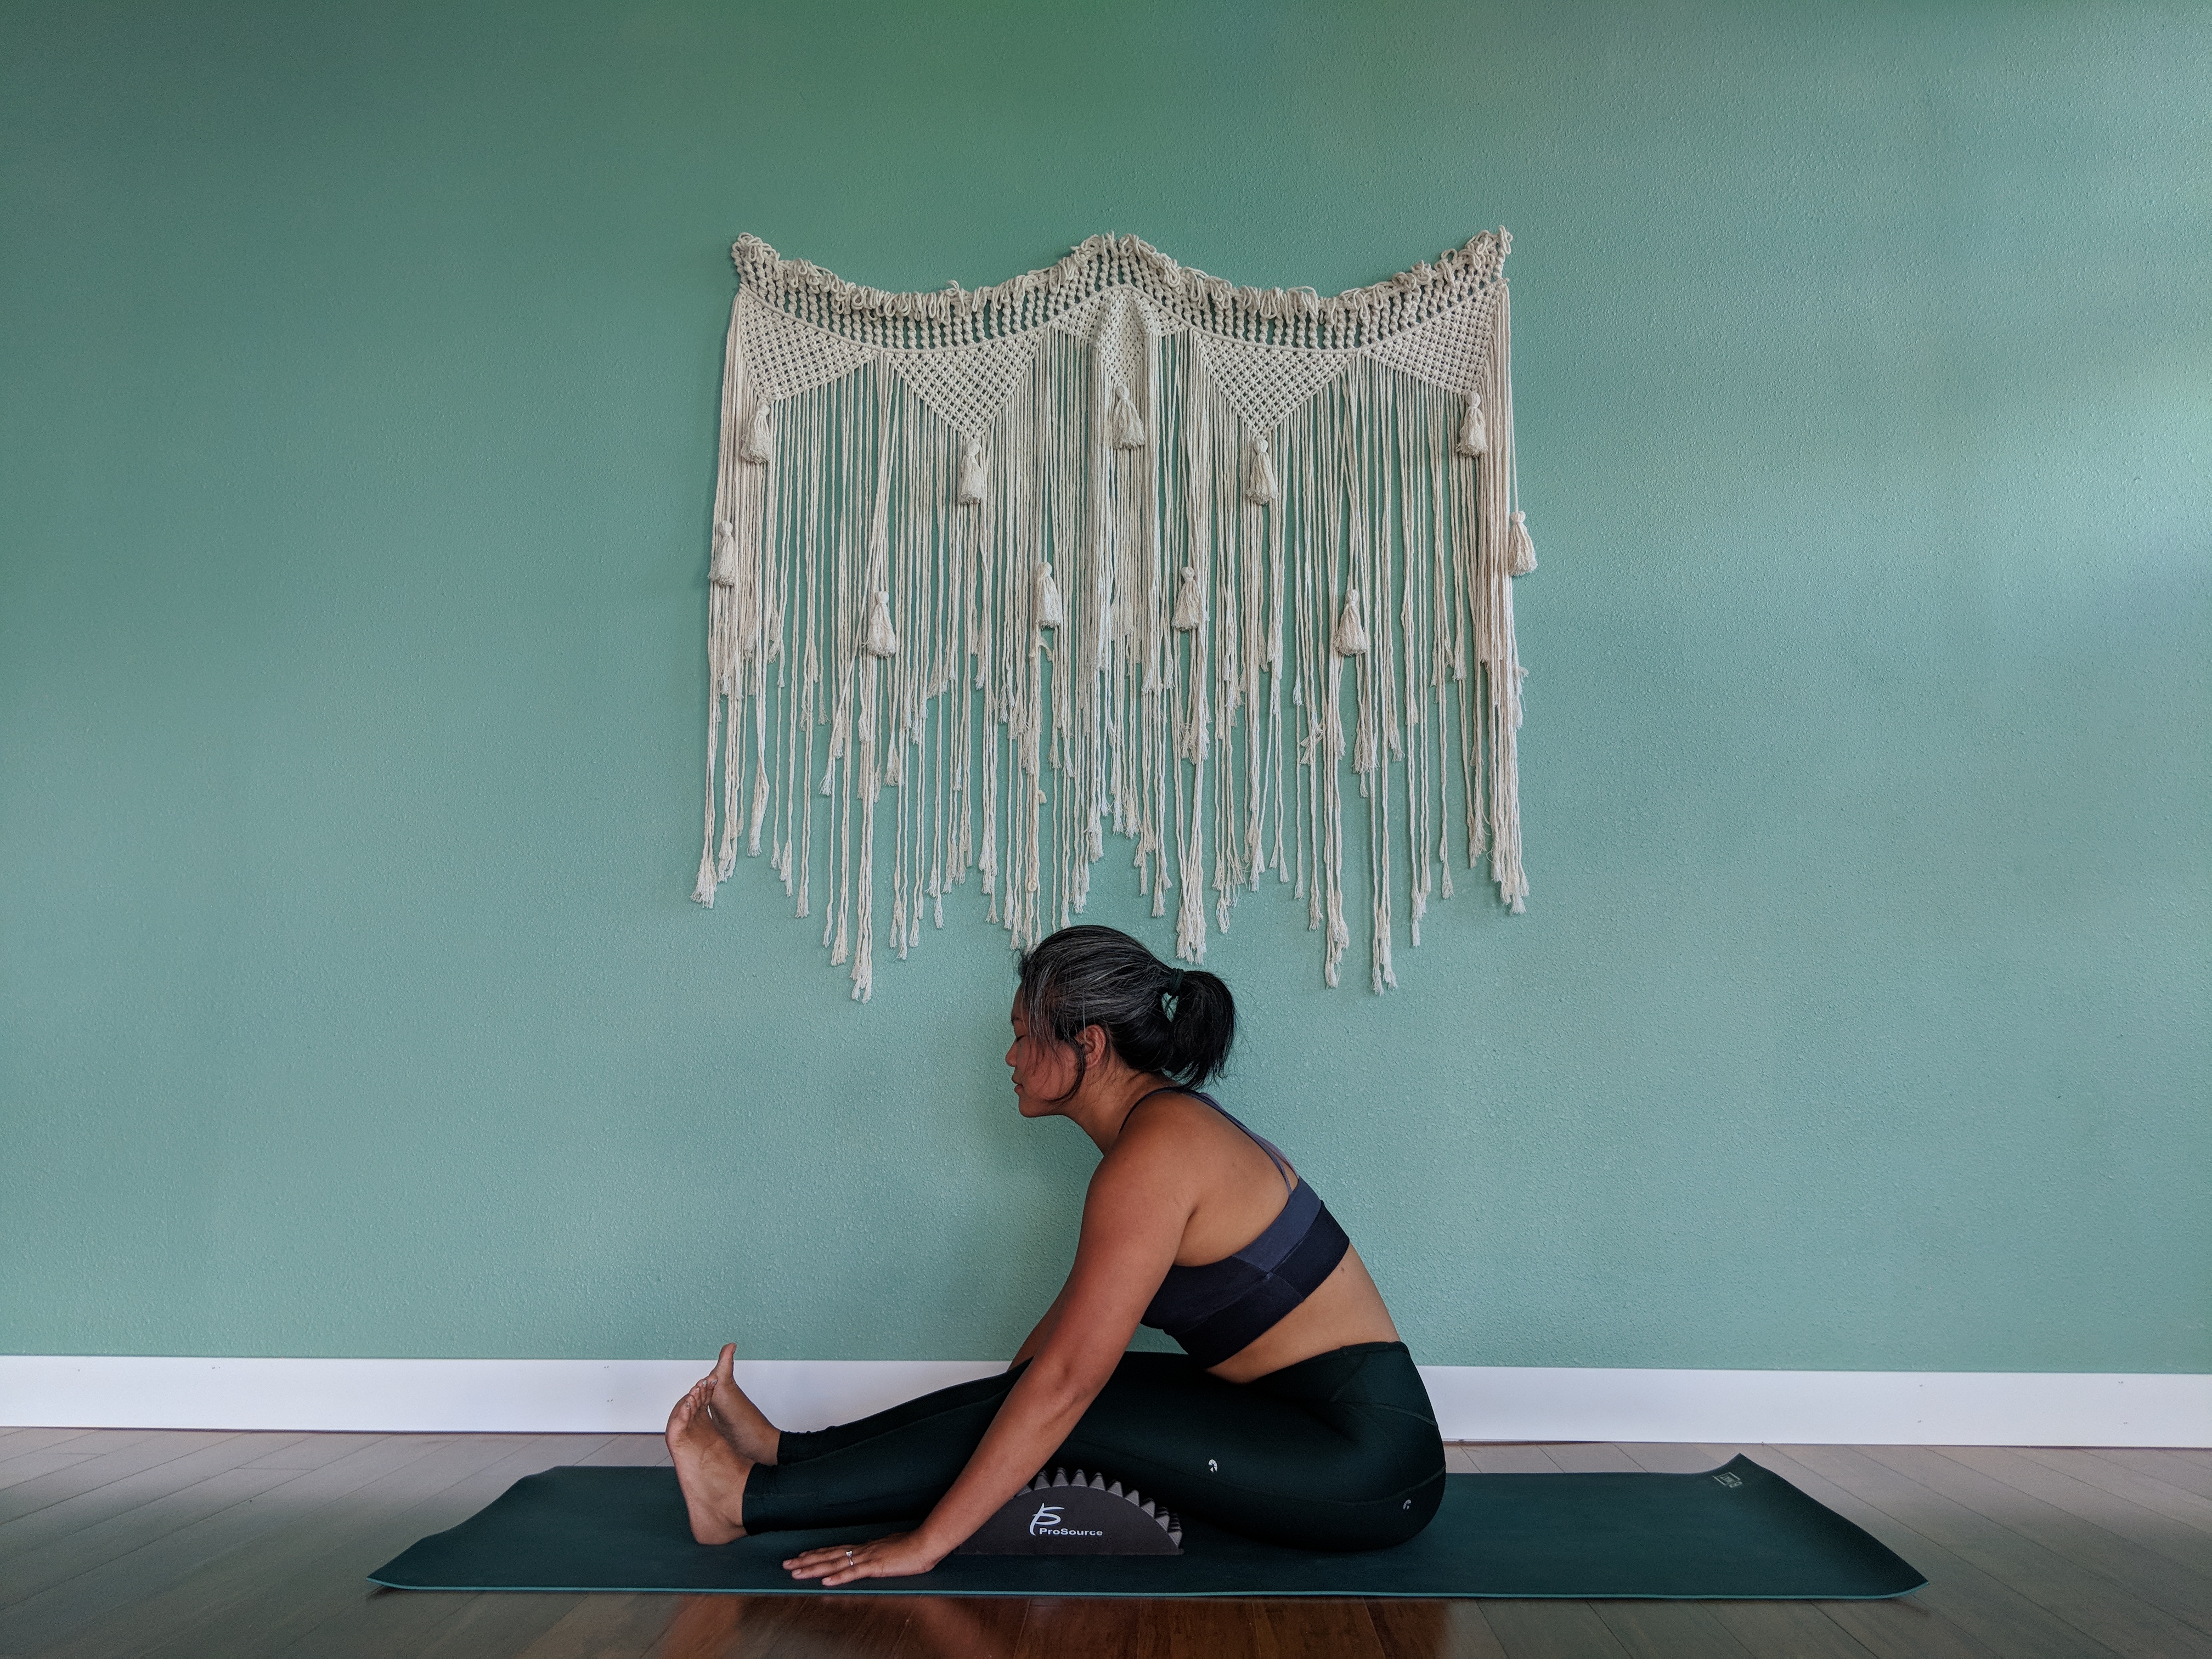
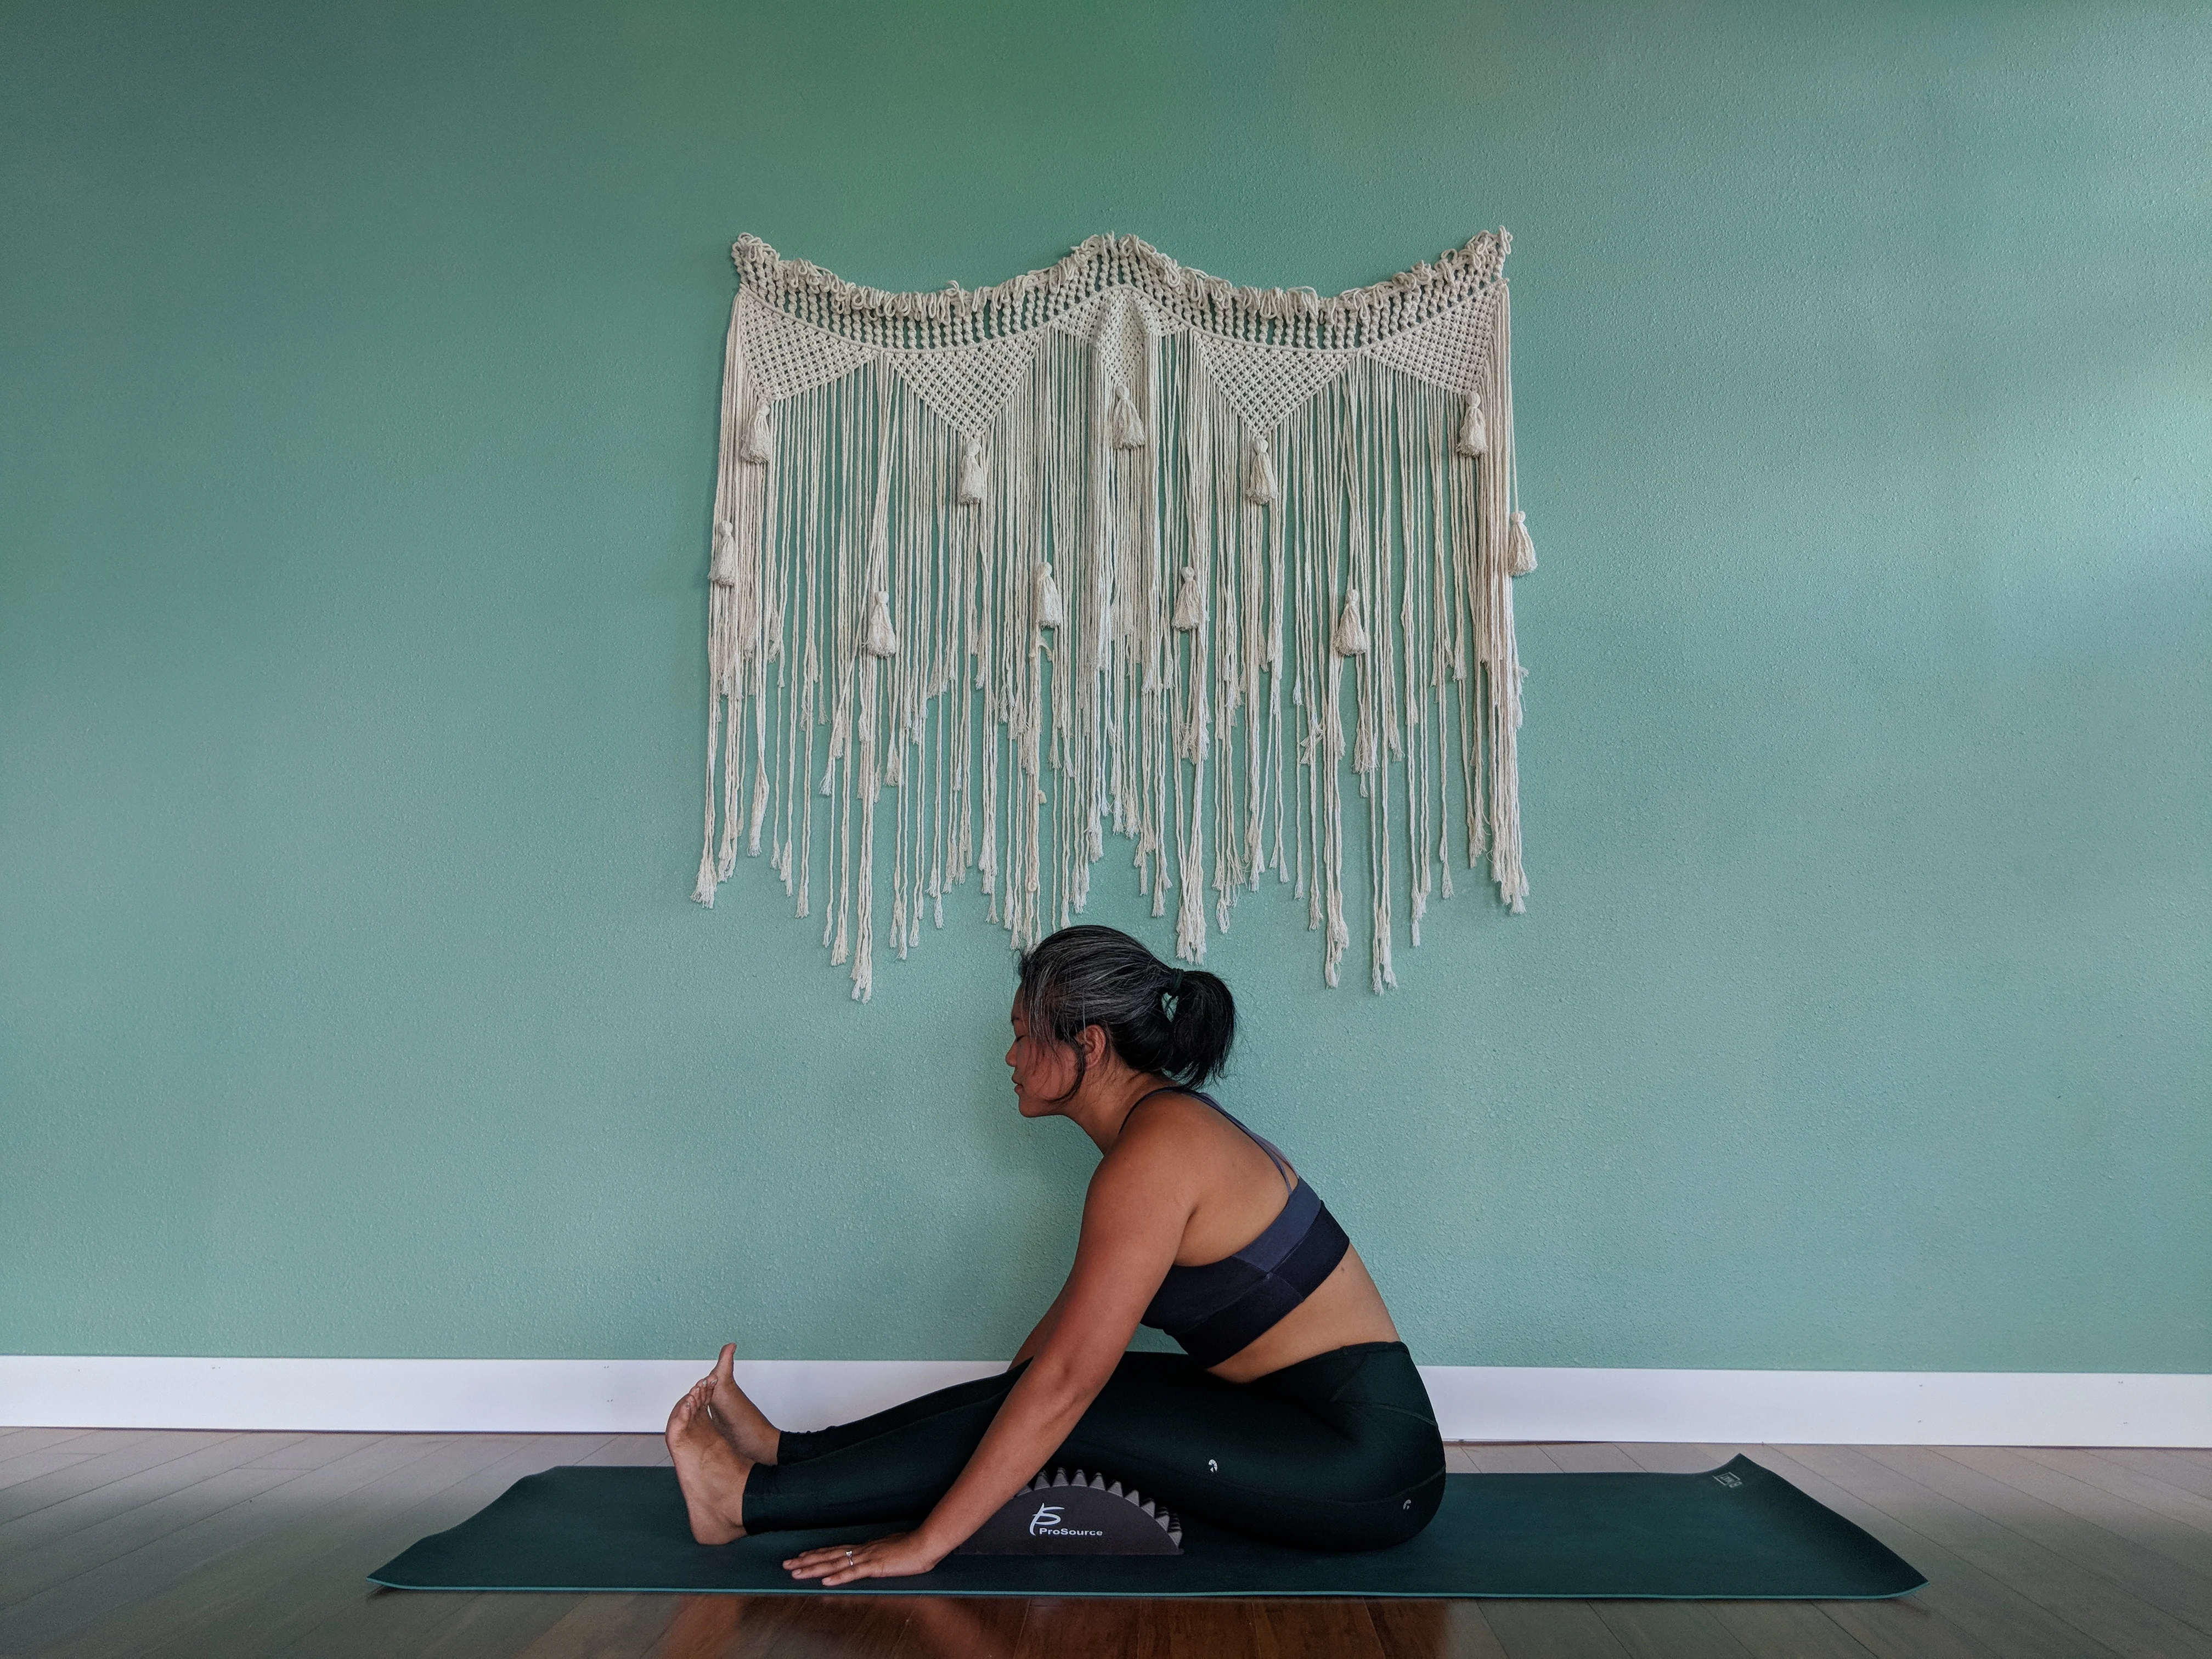
Seated forward Fold – Lifted Chest
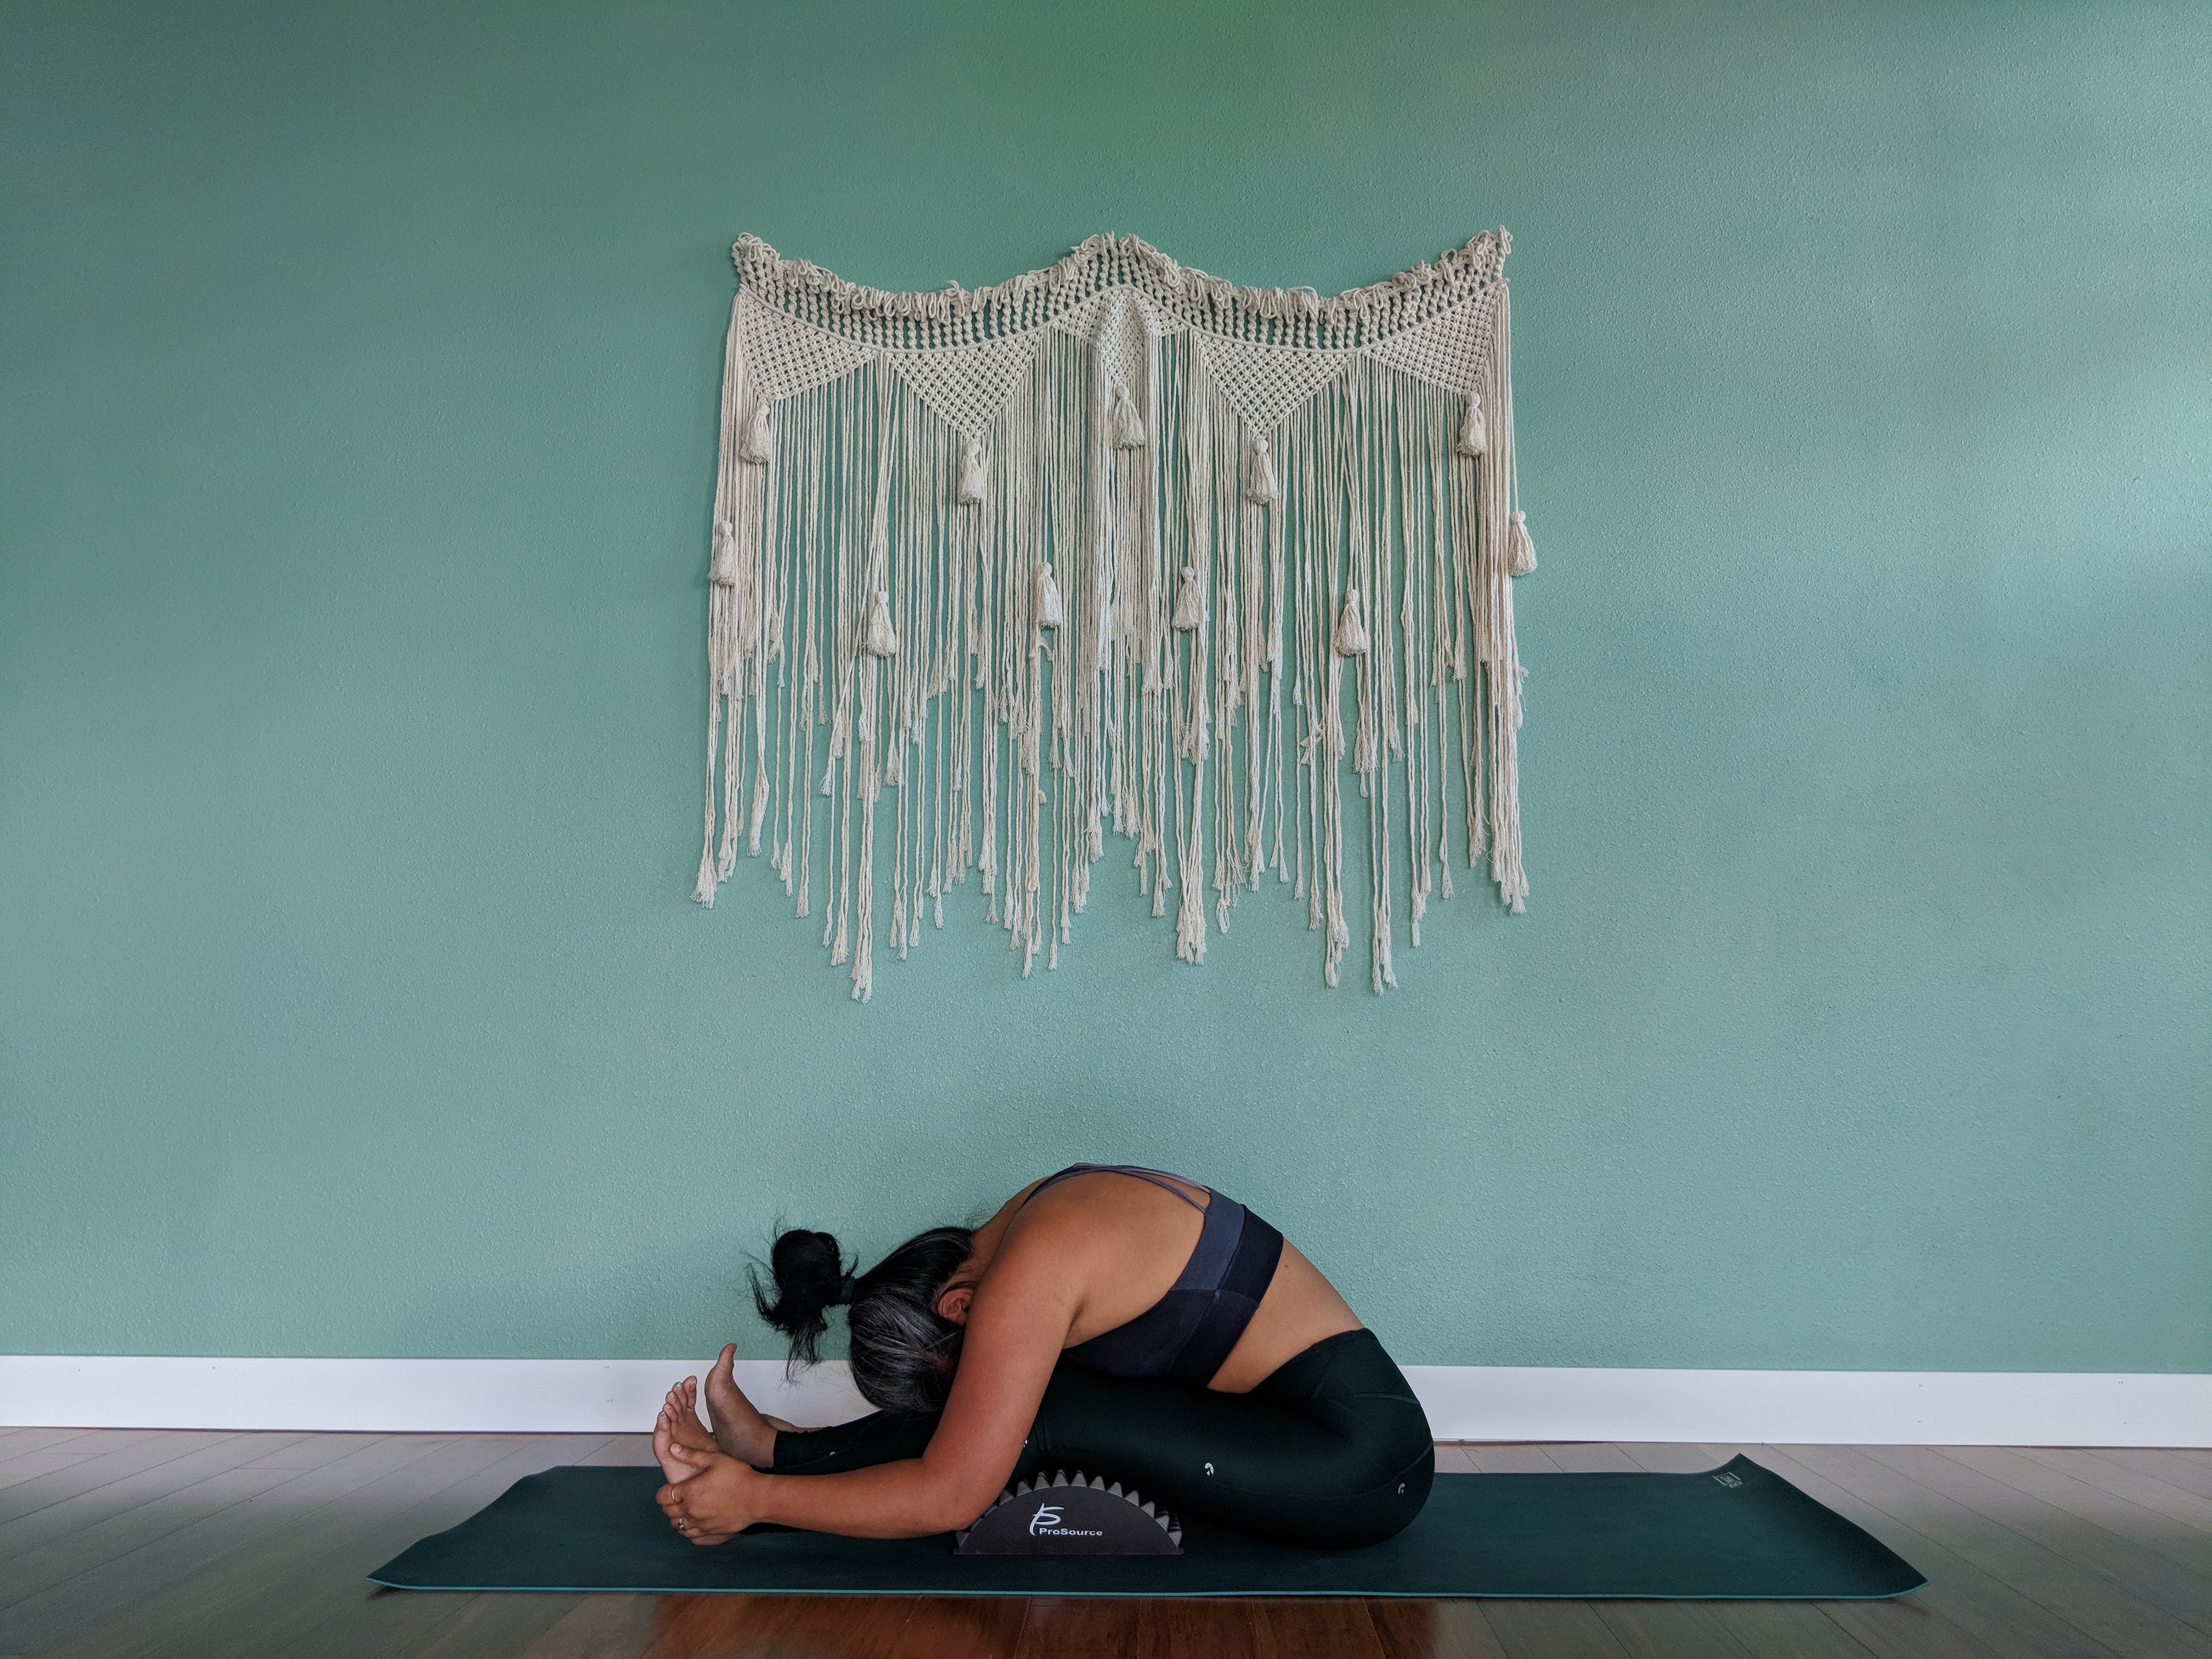
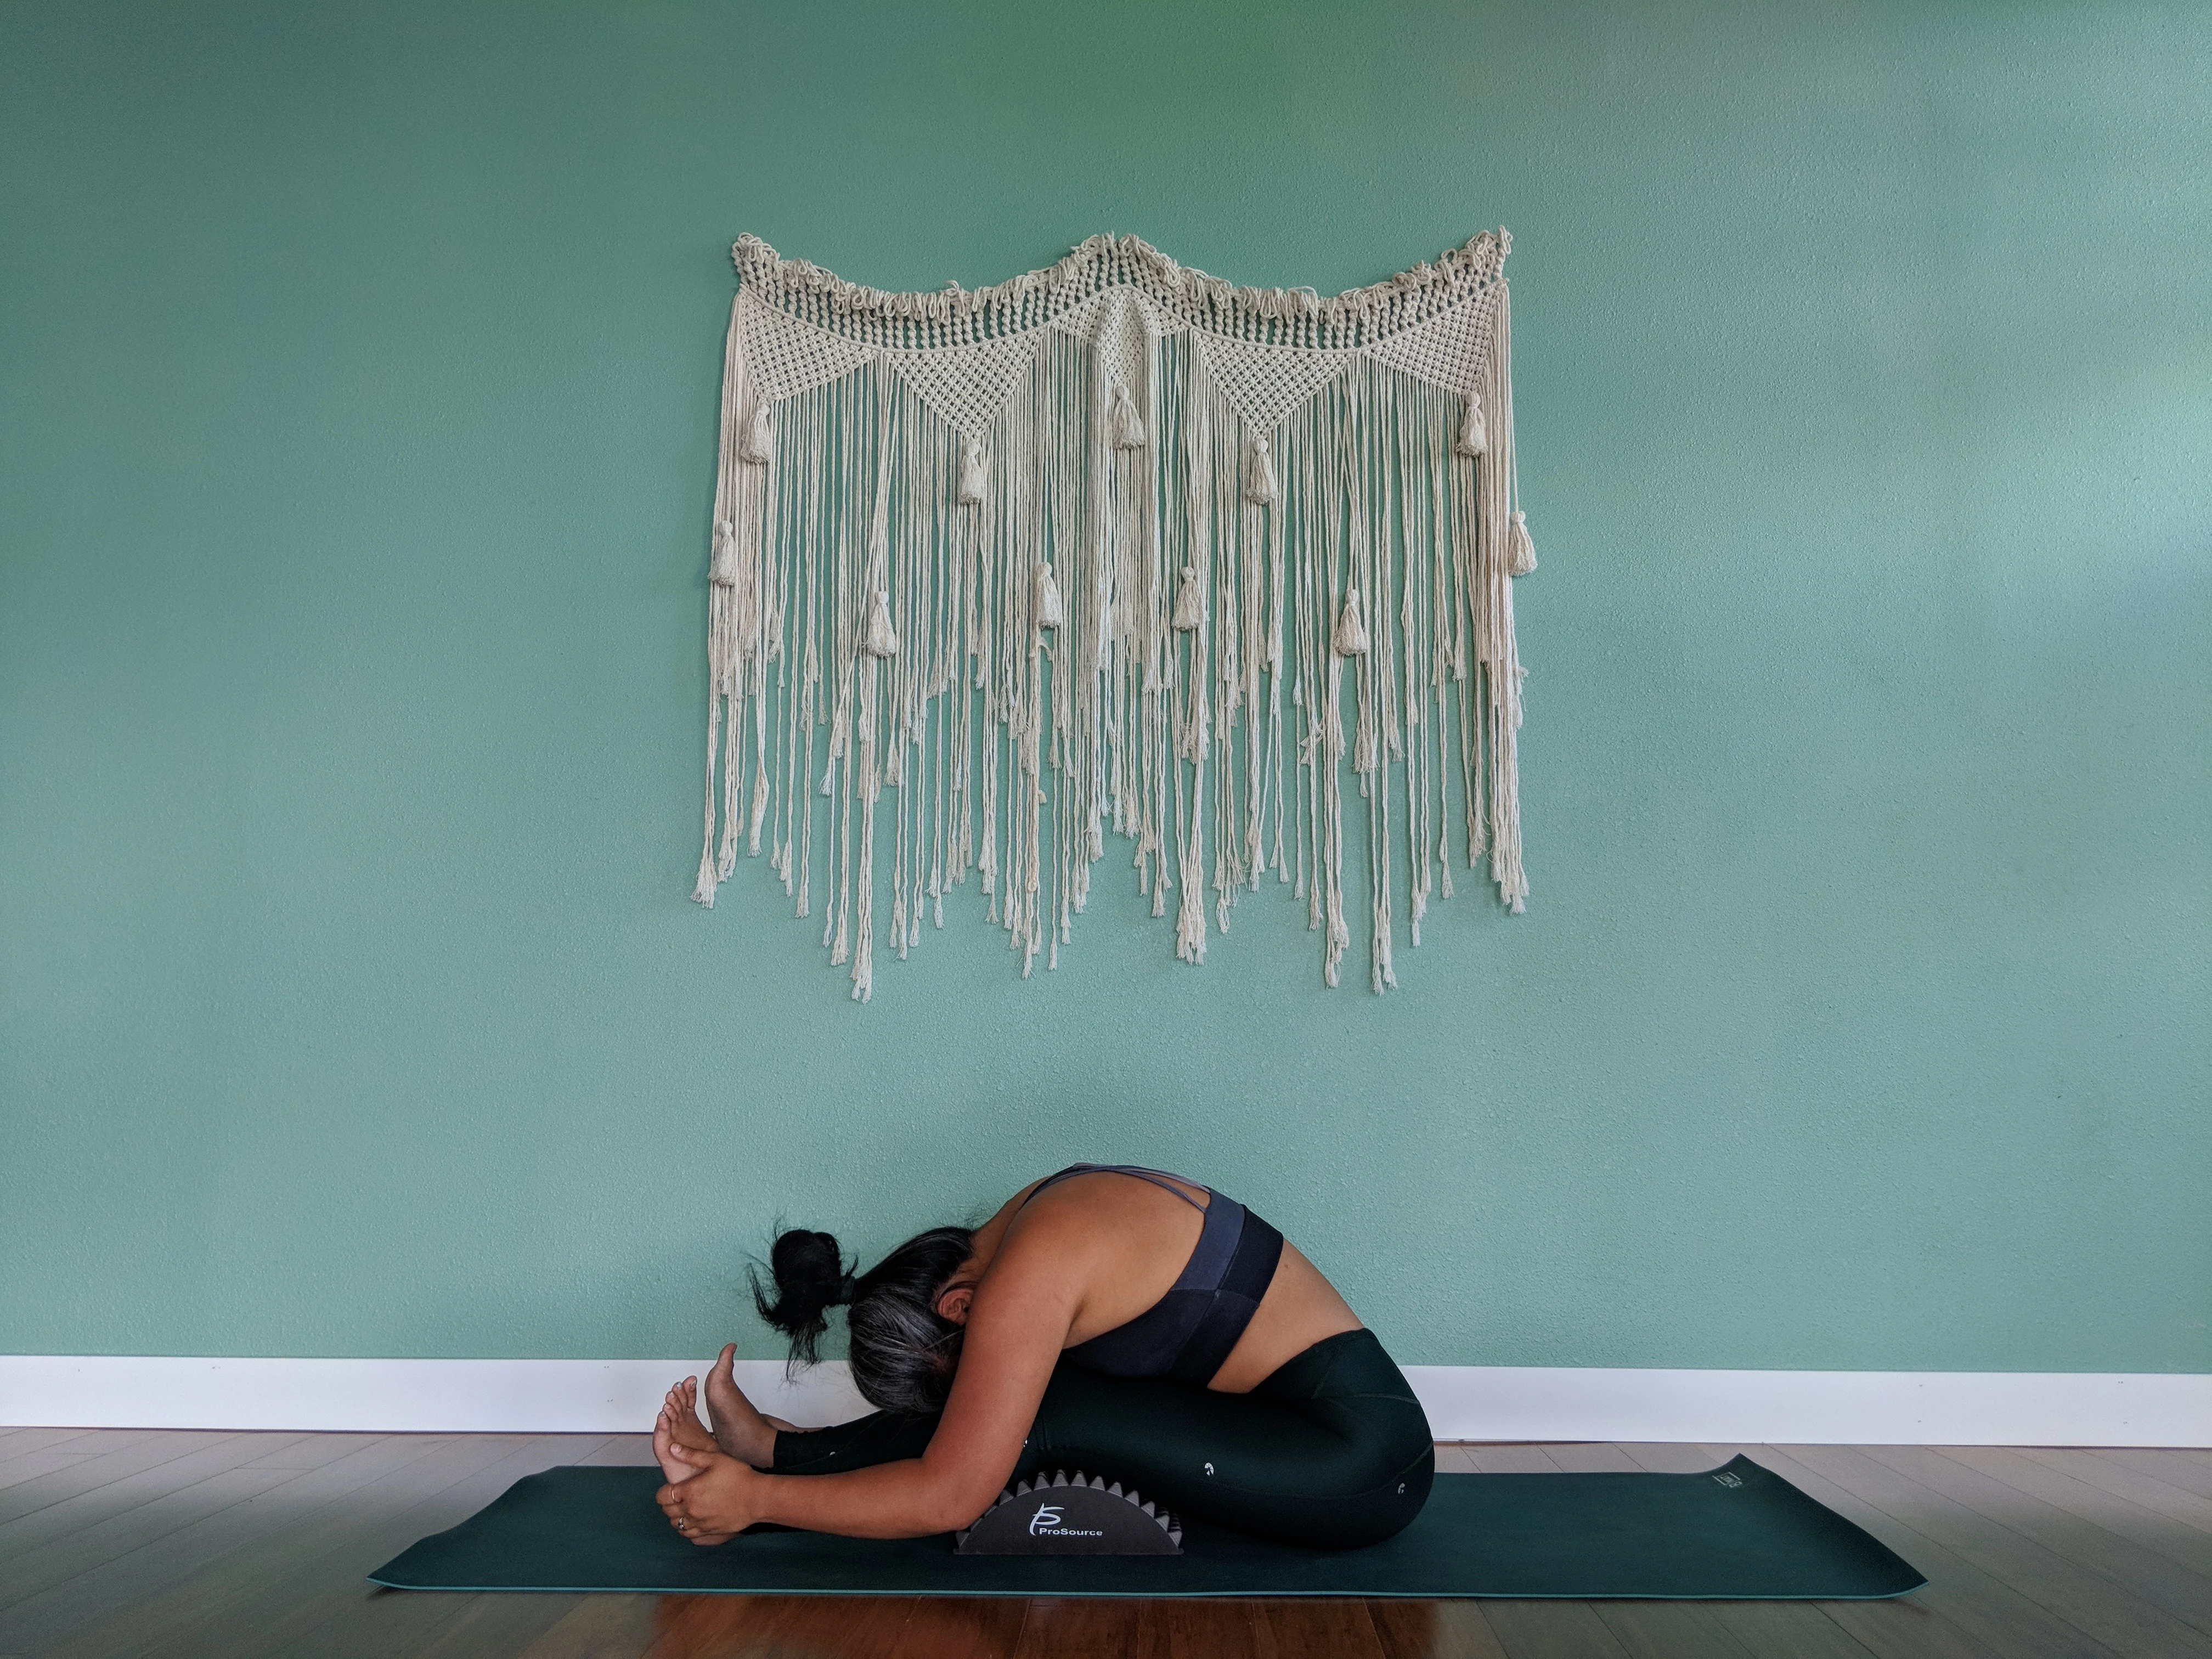
Deep seated forward fold.
Next up in seated forward fold or paschimottanasana (pash-ee-moh-tan-asah-na). This pose has always been a culprit in lower back pain. Tight hamstrings means more stress on your back. Sit on your mat with legs in front of you and move the stretcher underneath your knees. Begin to lengthen the legs until they land on the stretcher. Start with a straight back, and begin to walk your fingers towards your toes. Keep your back flat and hinge at your hips to come forward. Go as far as you feel comfortable. If you’re ready to go a little deeper, connect your check to the tops of your thighs and forehead to your shins. Stay here for 20 breaths.
Caution: This pose requires really open hamstrings and calves so make sure you warm up beforehand.
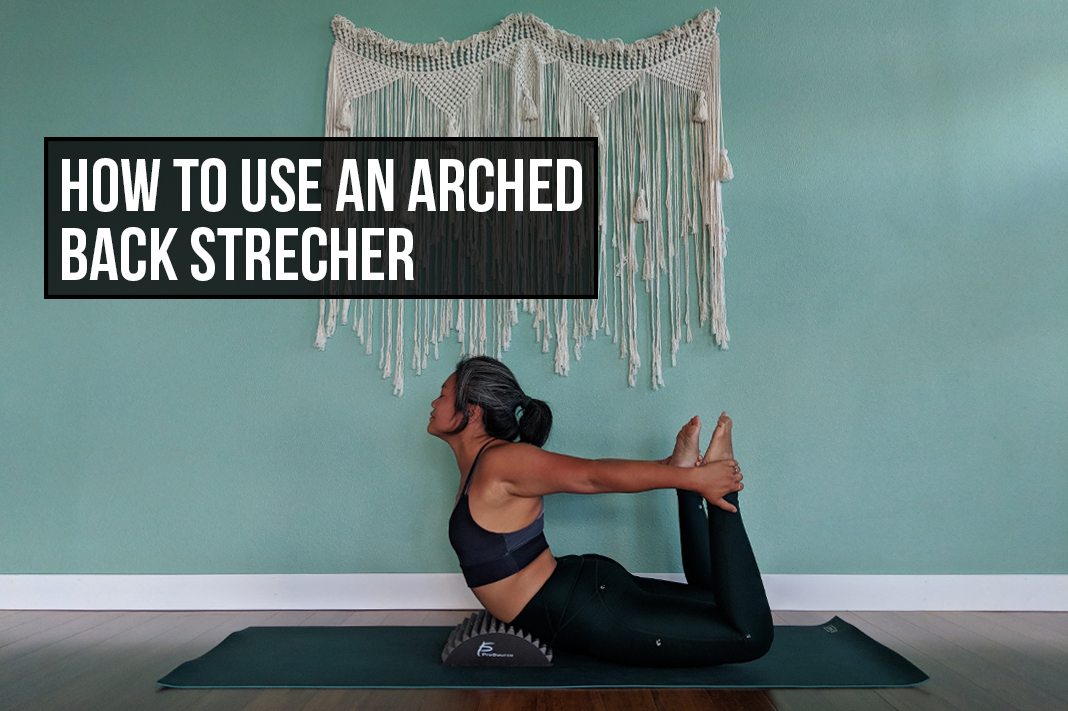
#3 Floor Bow (Dhanurasana)
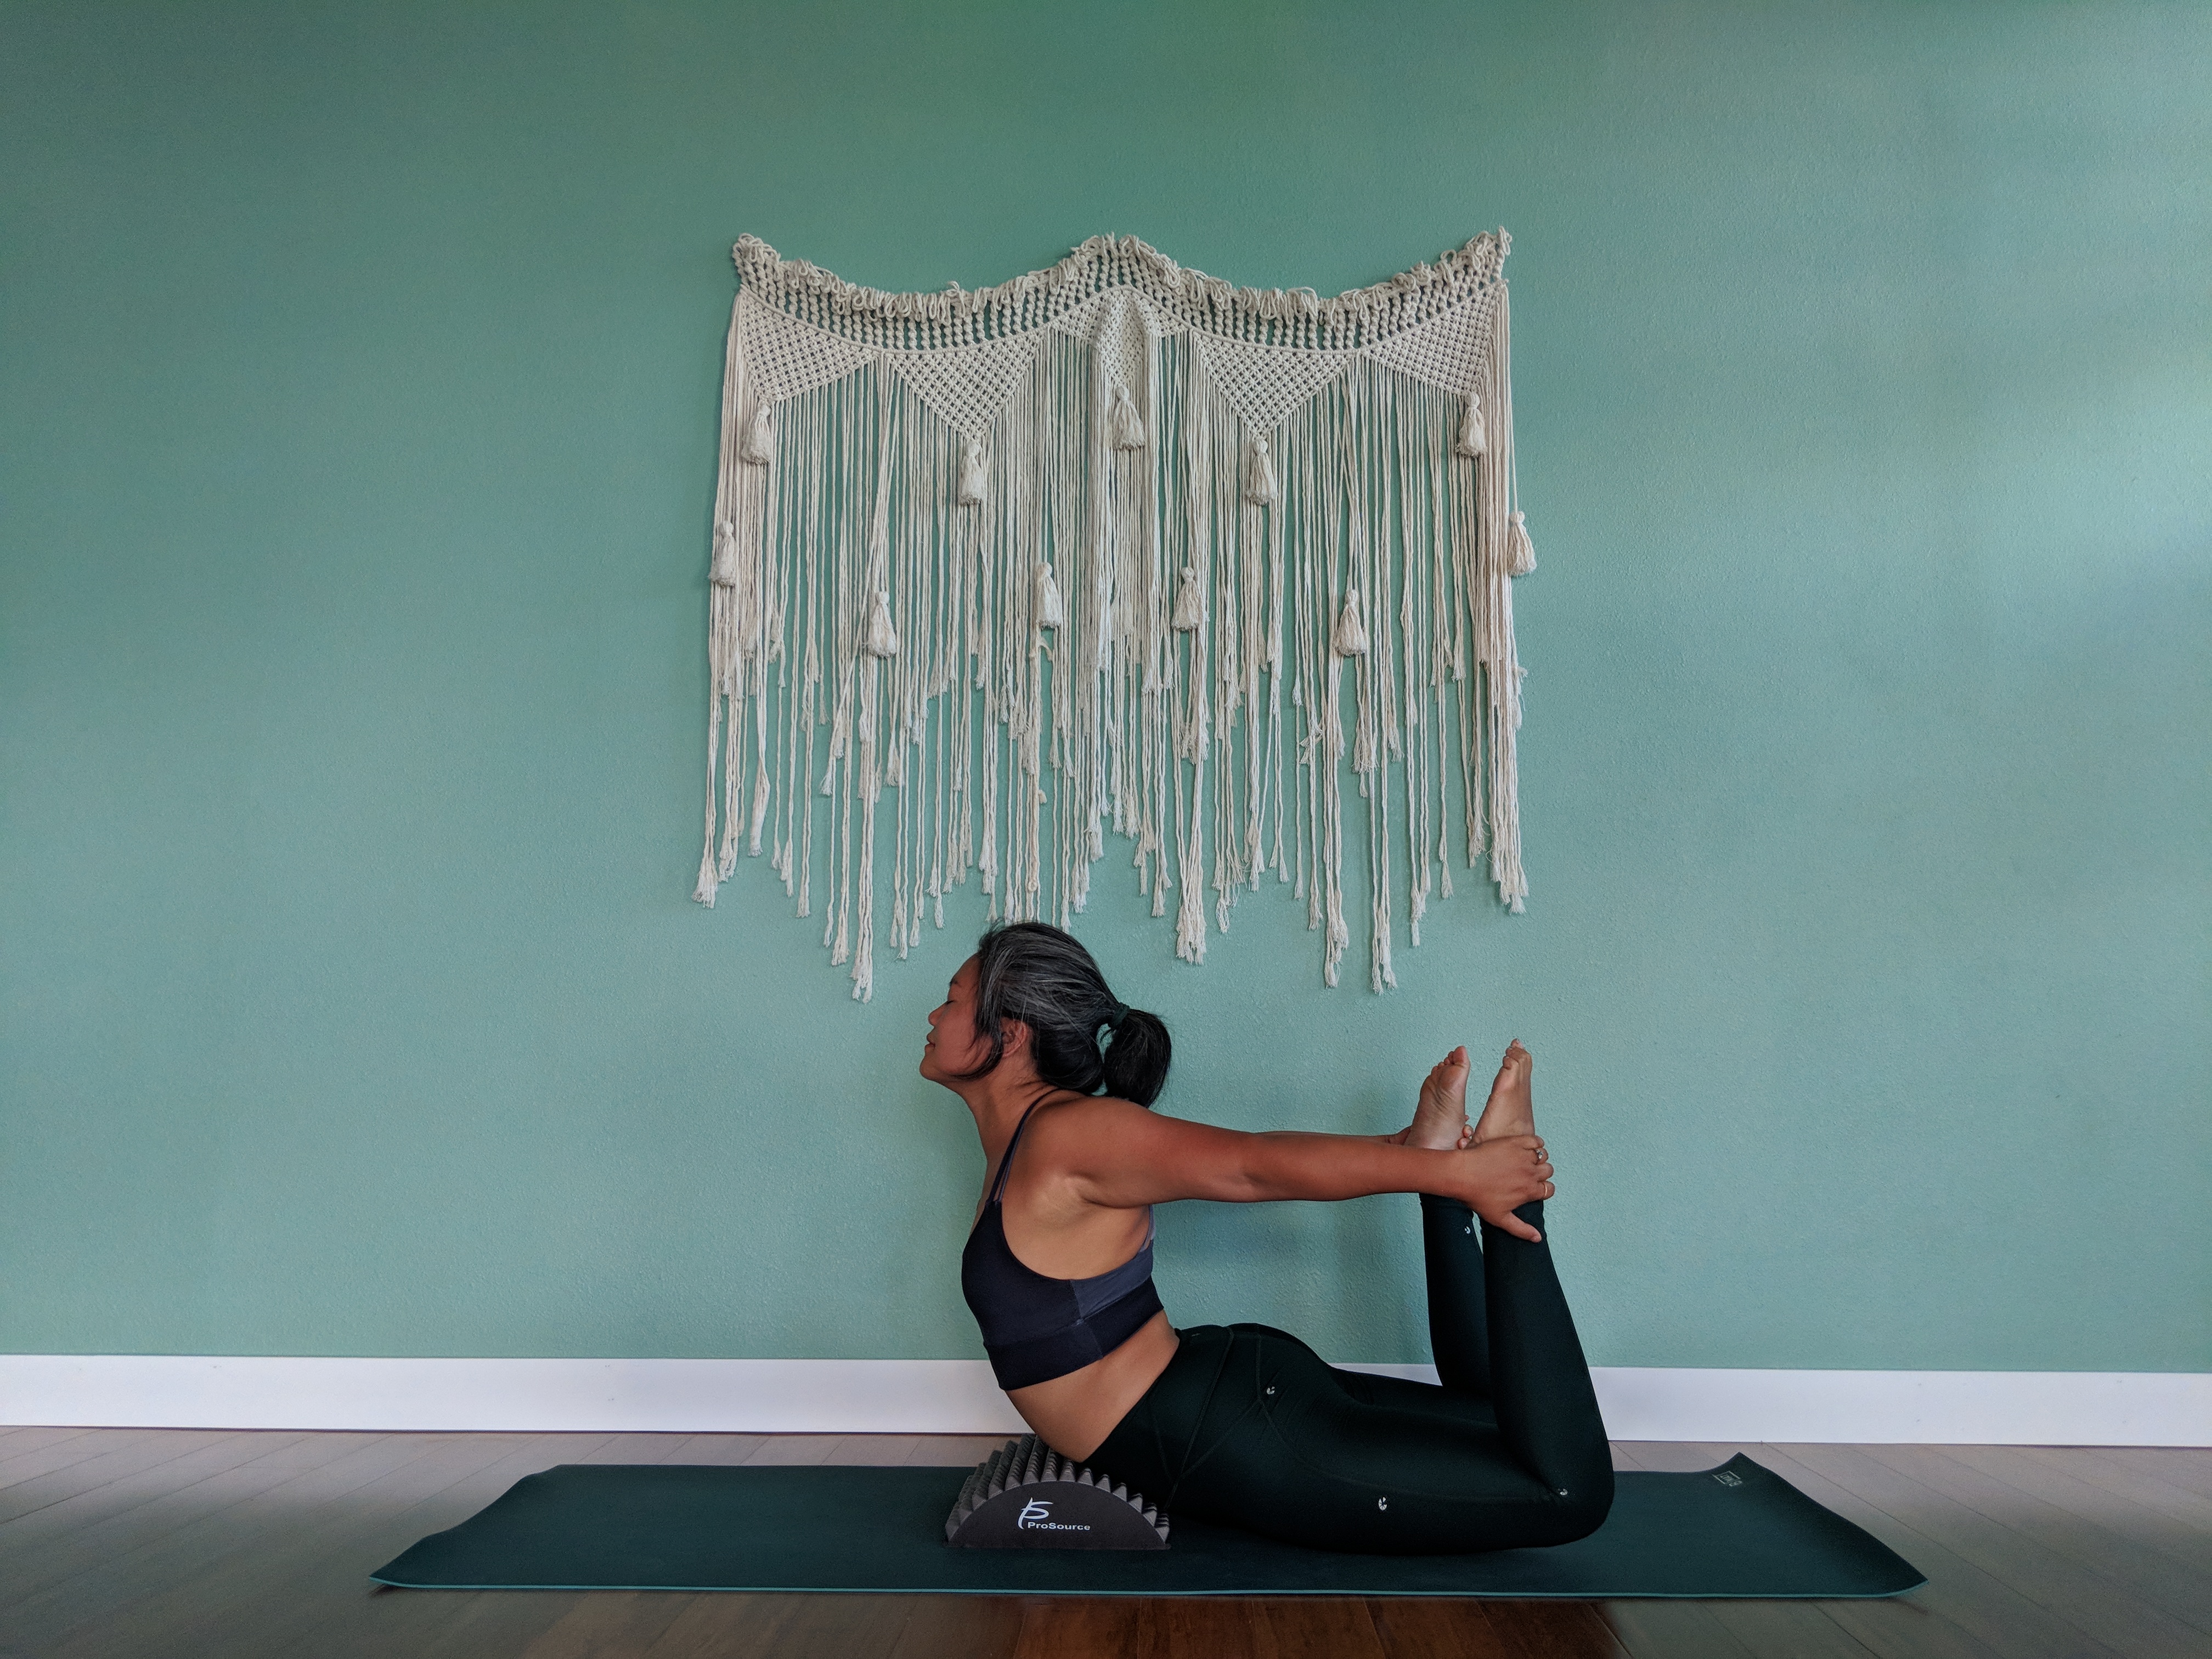

Floor Bow using Arched Back Stretcher
This is probably one of my favorite poses to get into with the arched back stretcher. It really supports the lift of the spine and allows you to focus on engaging and strengthening muscles along the back of the body.
Place the stretcher in the middle of your mat and lay your belly onto the stretcher. bend your knees and reach back and grab the tops of your feet. Feet can be flexed or pointed. Take a deep inhale to into your lungs and kick into your hands as you exhale to lift your chest away from the ground. Feel your chest open up and the ease of coming into wheel pose. Engage and squeeze your entire back (spine, hamstrings, and calves). Stay here for 10 breaths.
#4 Self Foot Massage
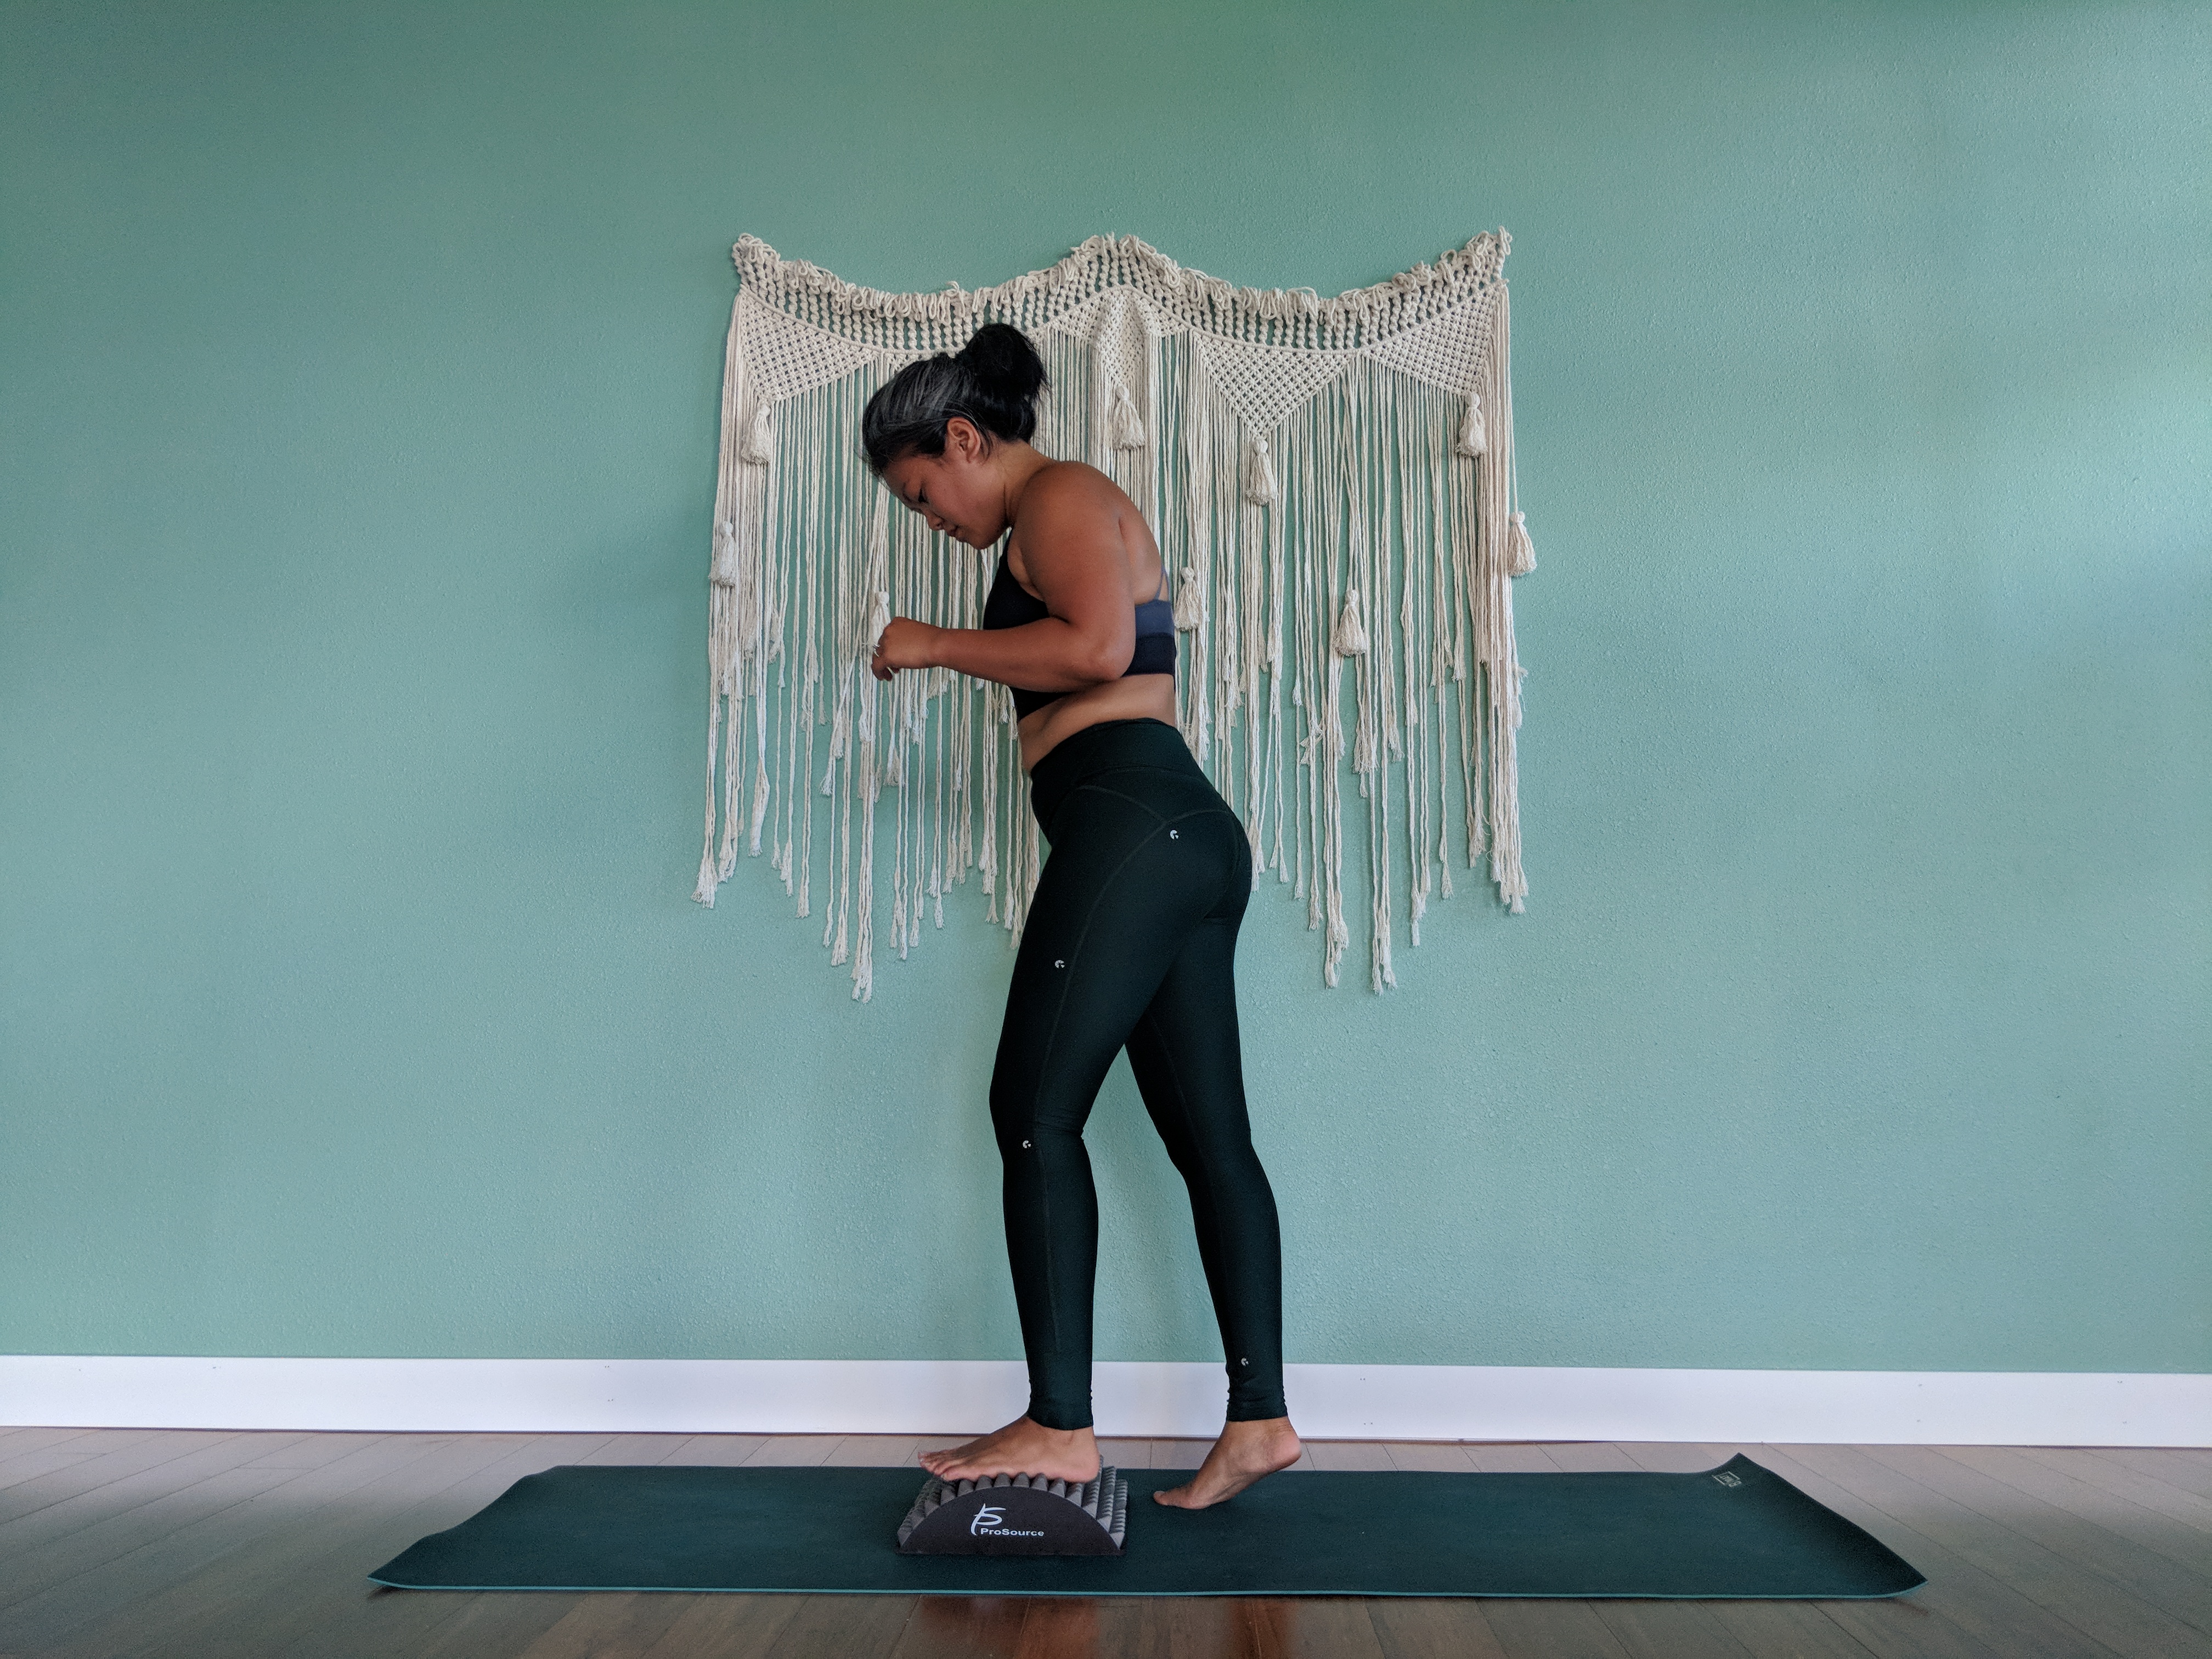
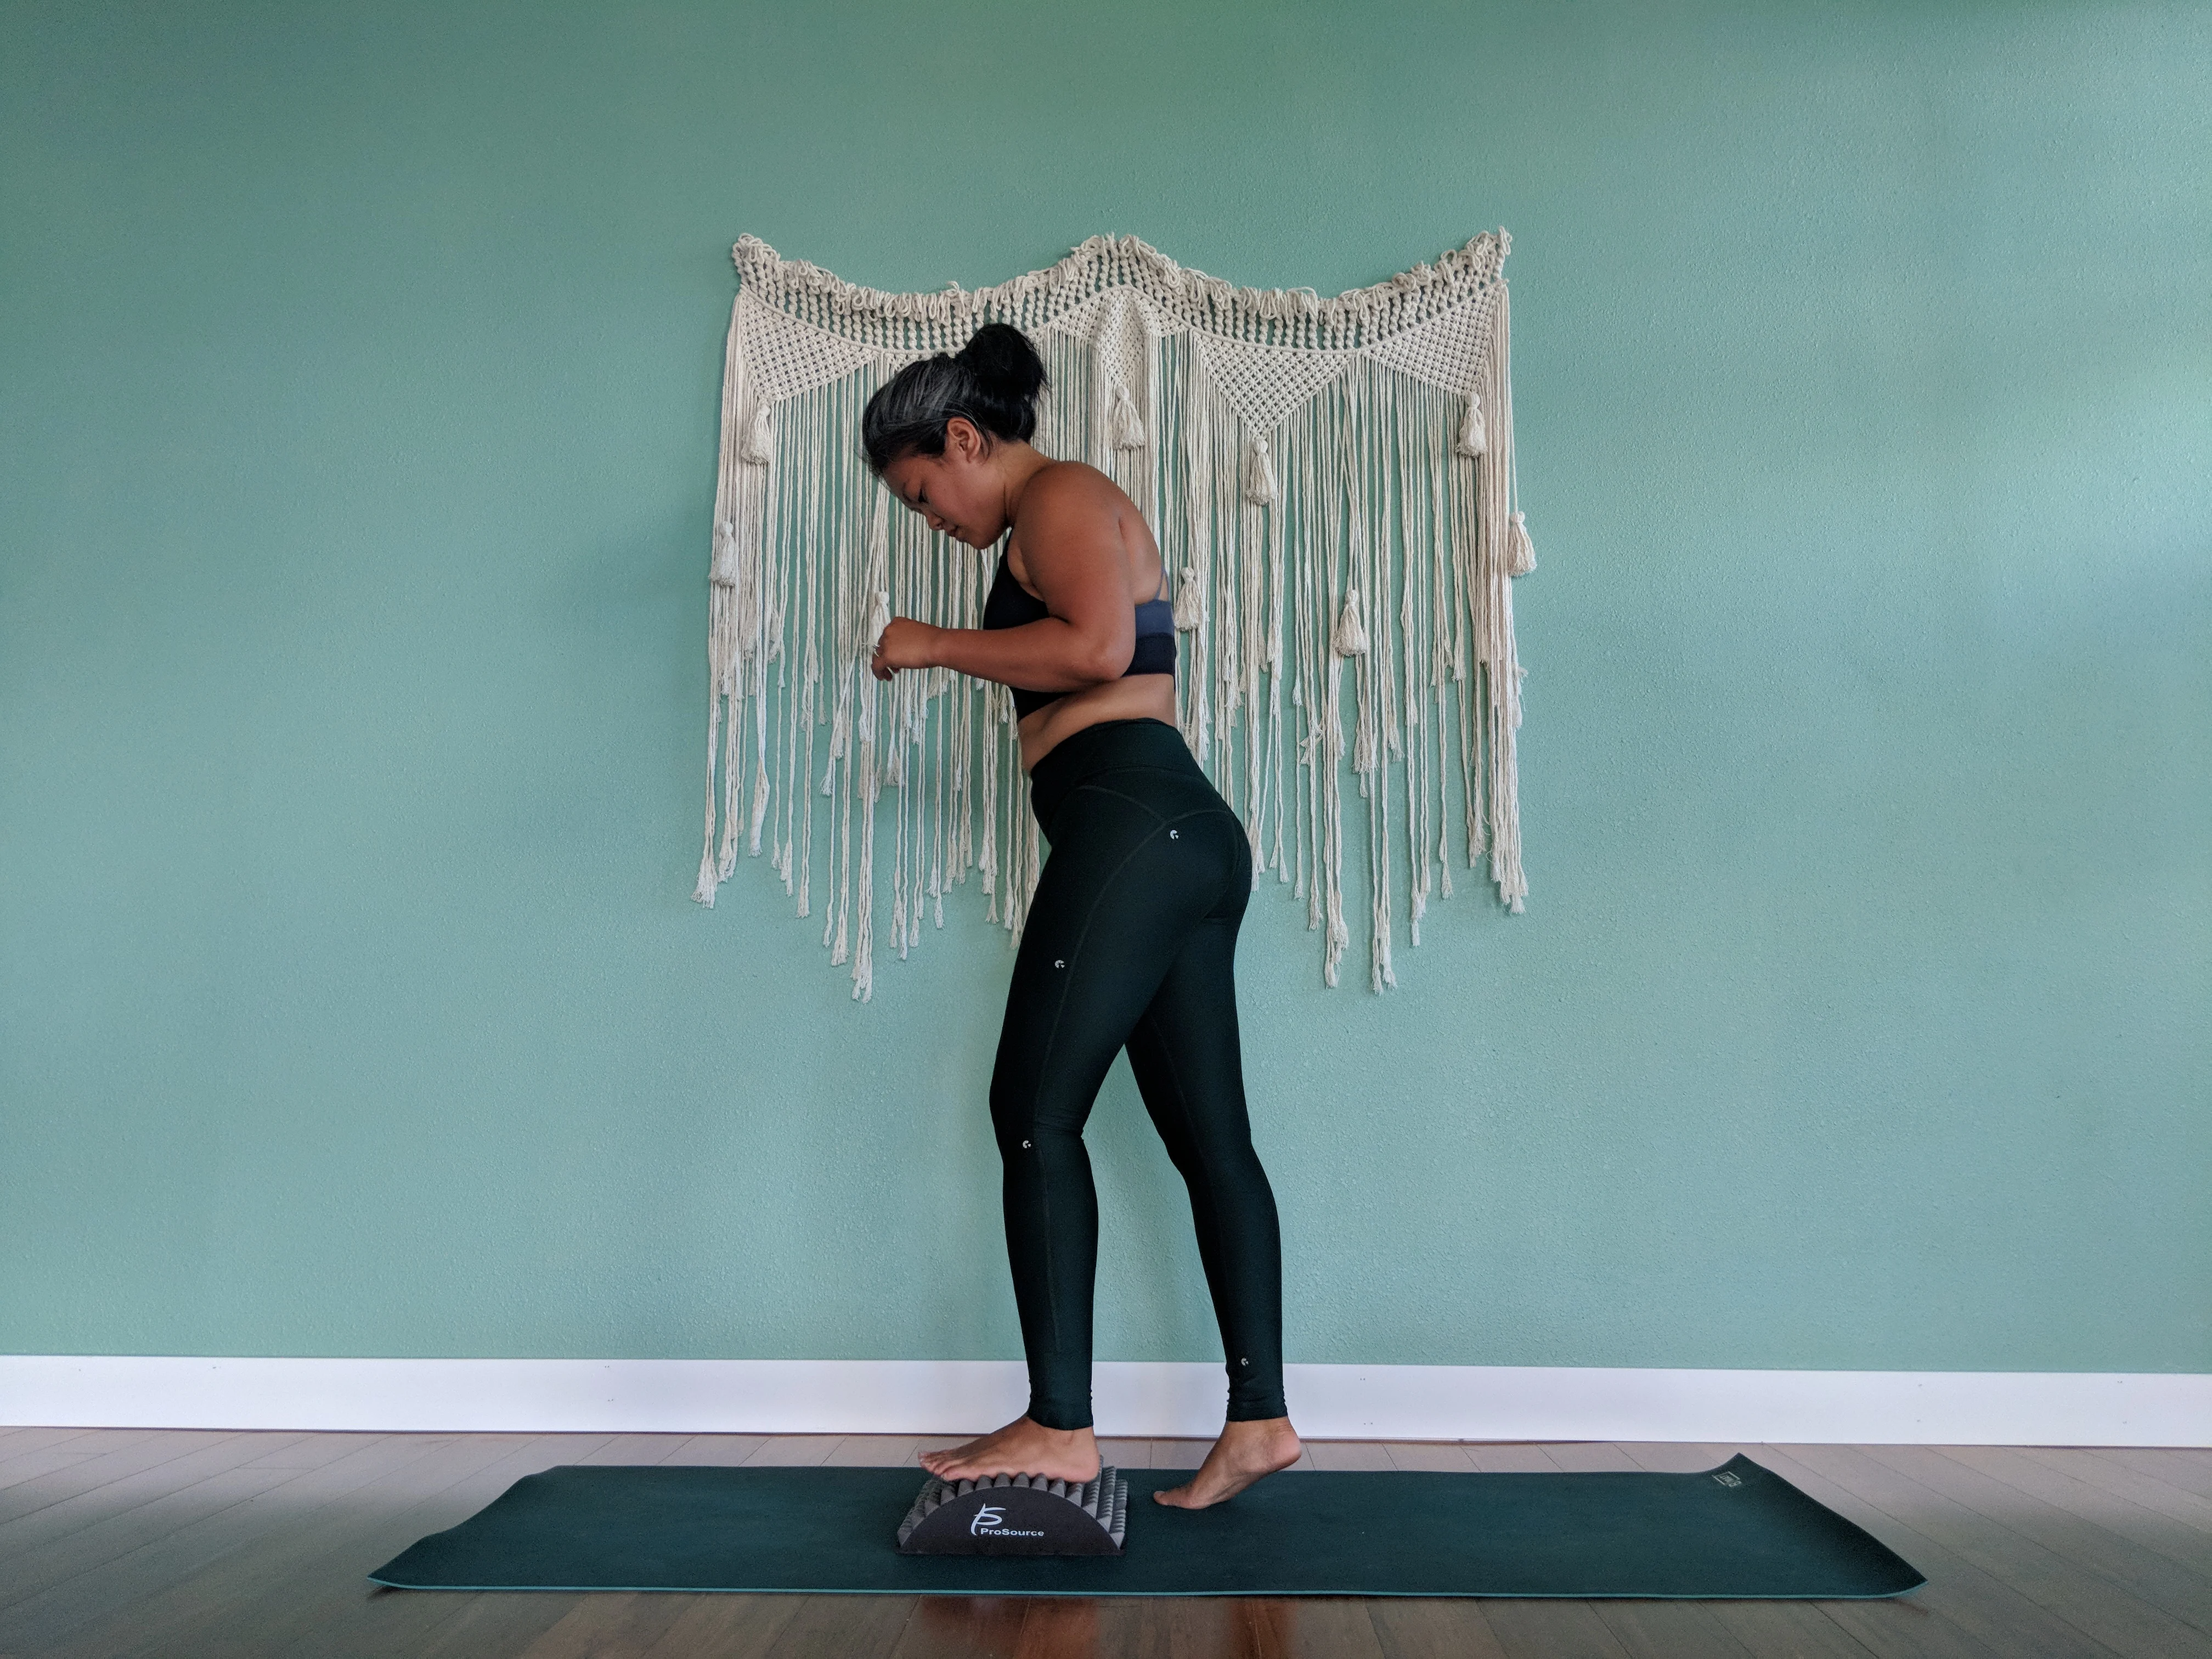
Self Foot massage
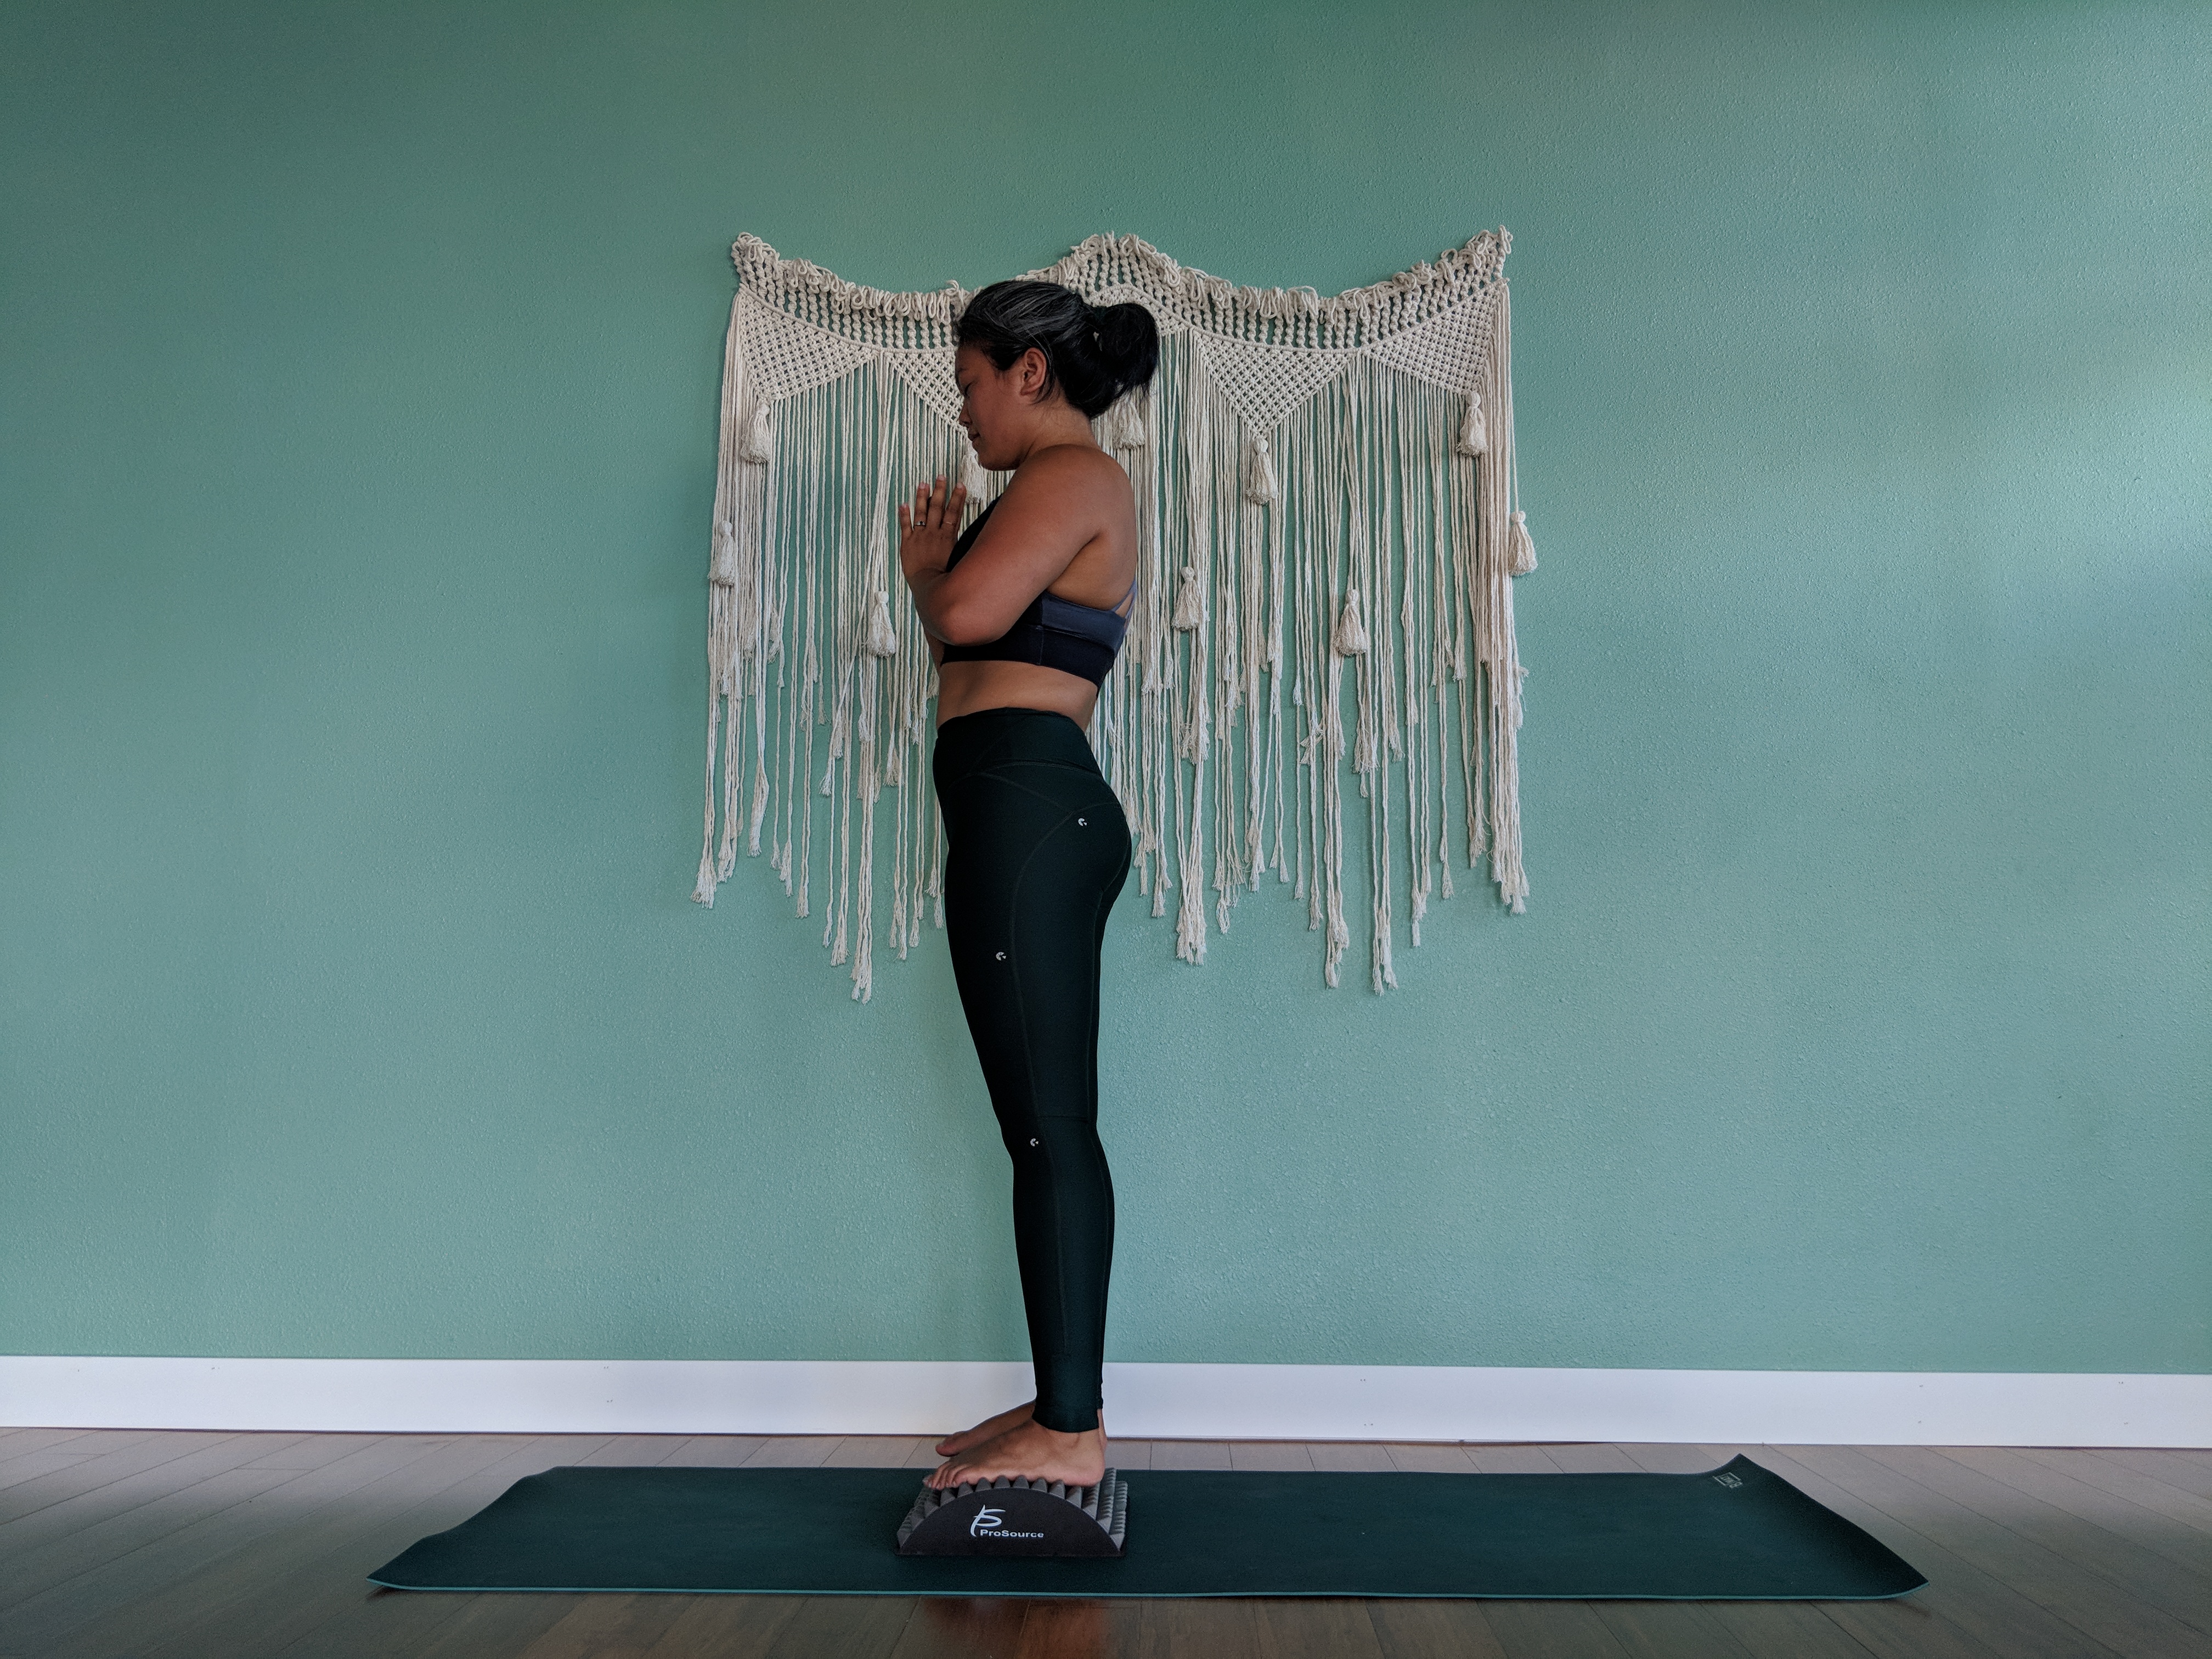
Working on balance while massaging feet.
This is a fun one for aching feet. After a long day of traveling, teaching or just being on my feet, I just want someone to massage my feet. Luckily I can do it myself.
Start by massaging one foot at a time onto the foam spikes of your stretcher. Move the foot around the stretcher to target different parts on the sole of your foot. Switch feet when you feel ready.
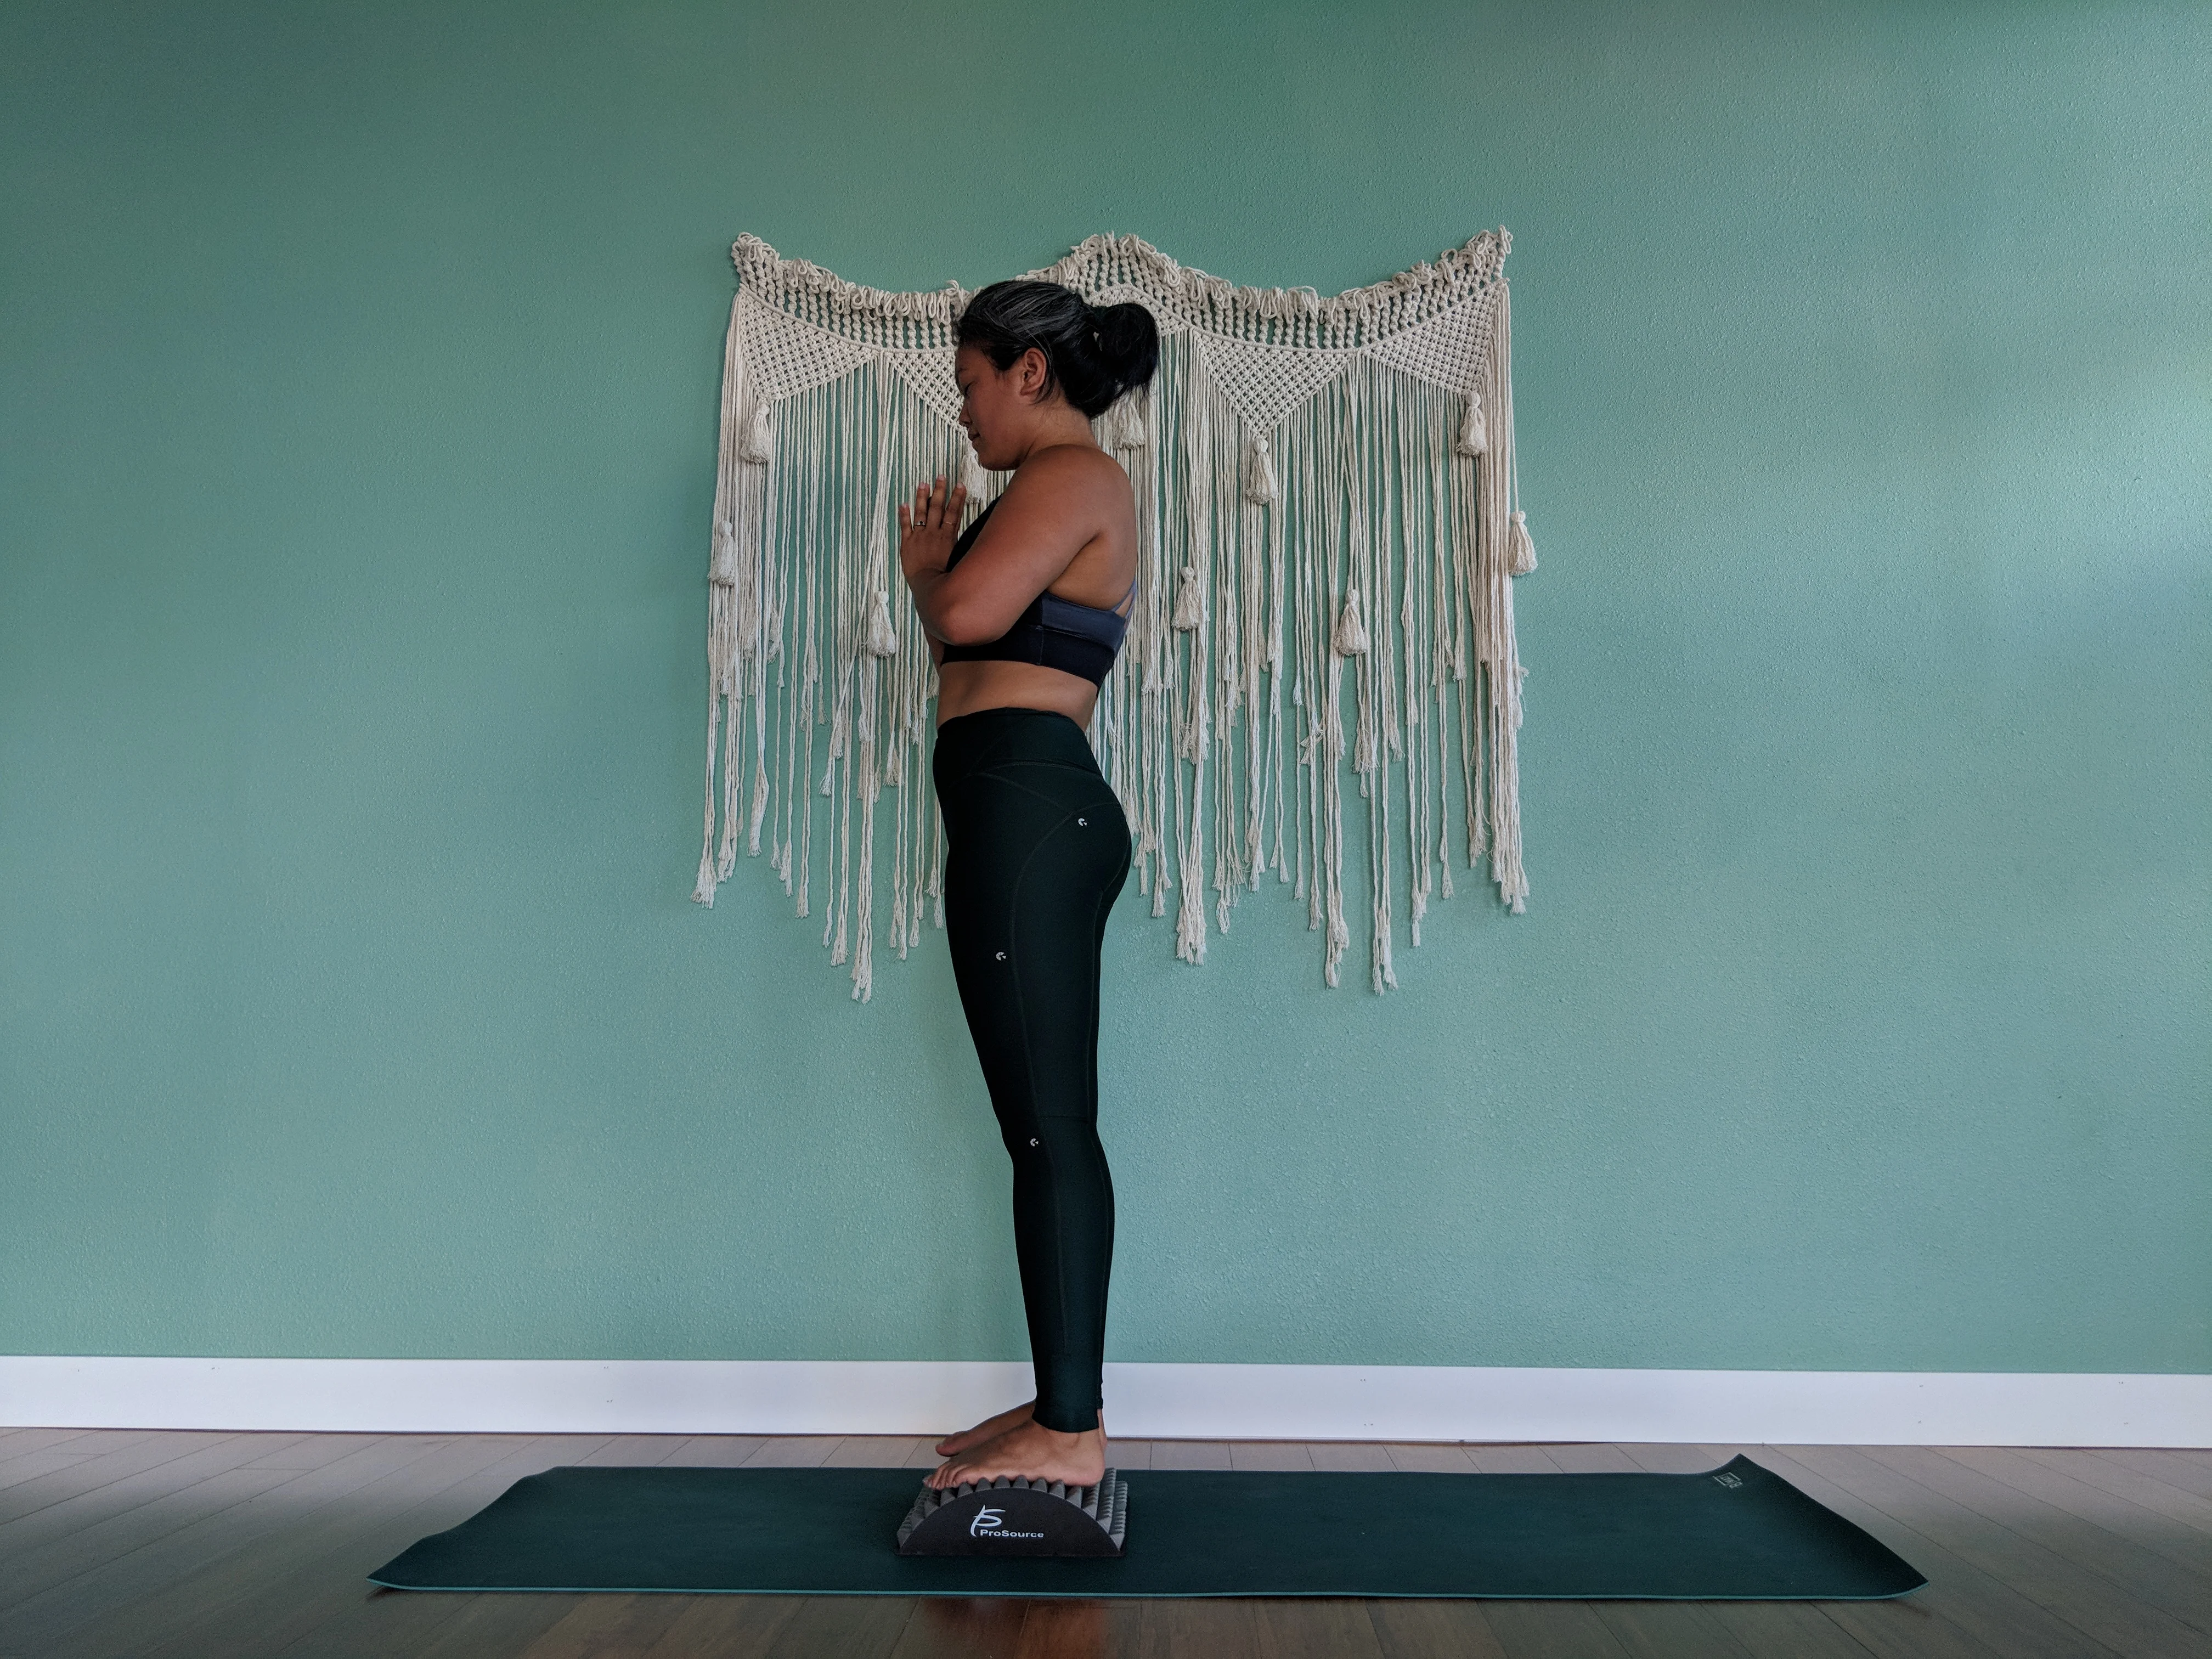
Modify: Step both feet onto the stretcher to work on your balance. You can bring your hands into prayer at your chest or leave them by your side. Find your balance on the stretcher. Once you’ve found your balance, close your eyes and stay here for 15-20 breaths. Work on both your balance while massaging your feet.
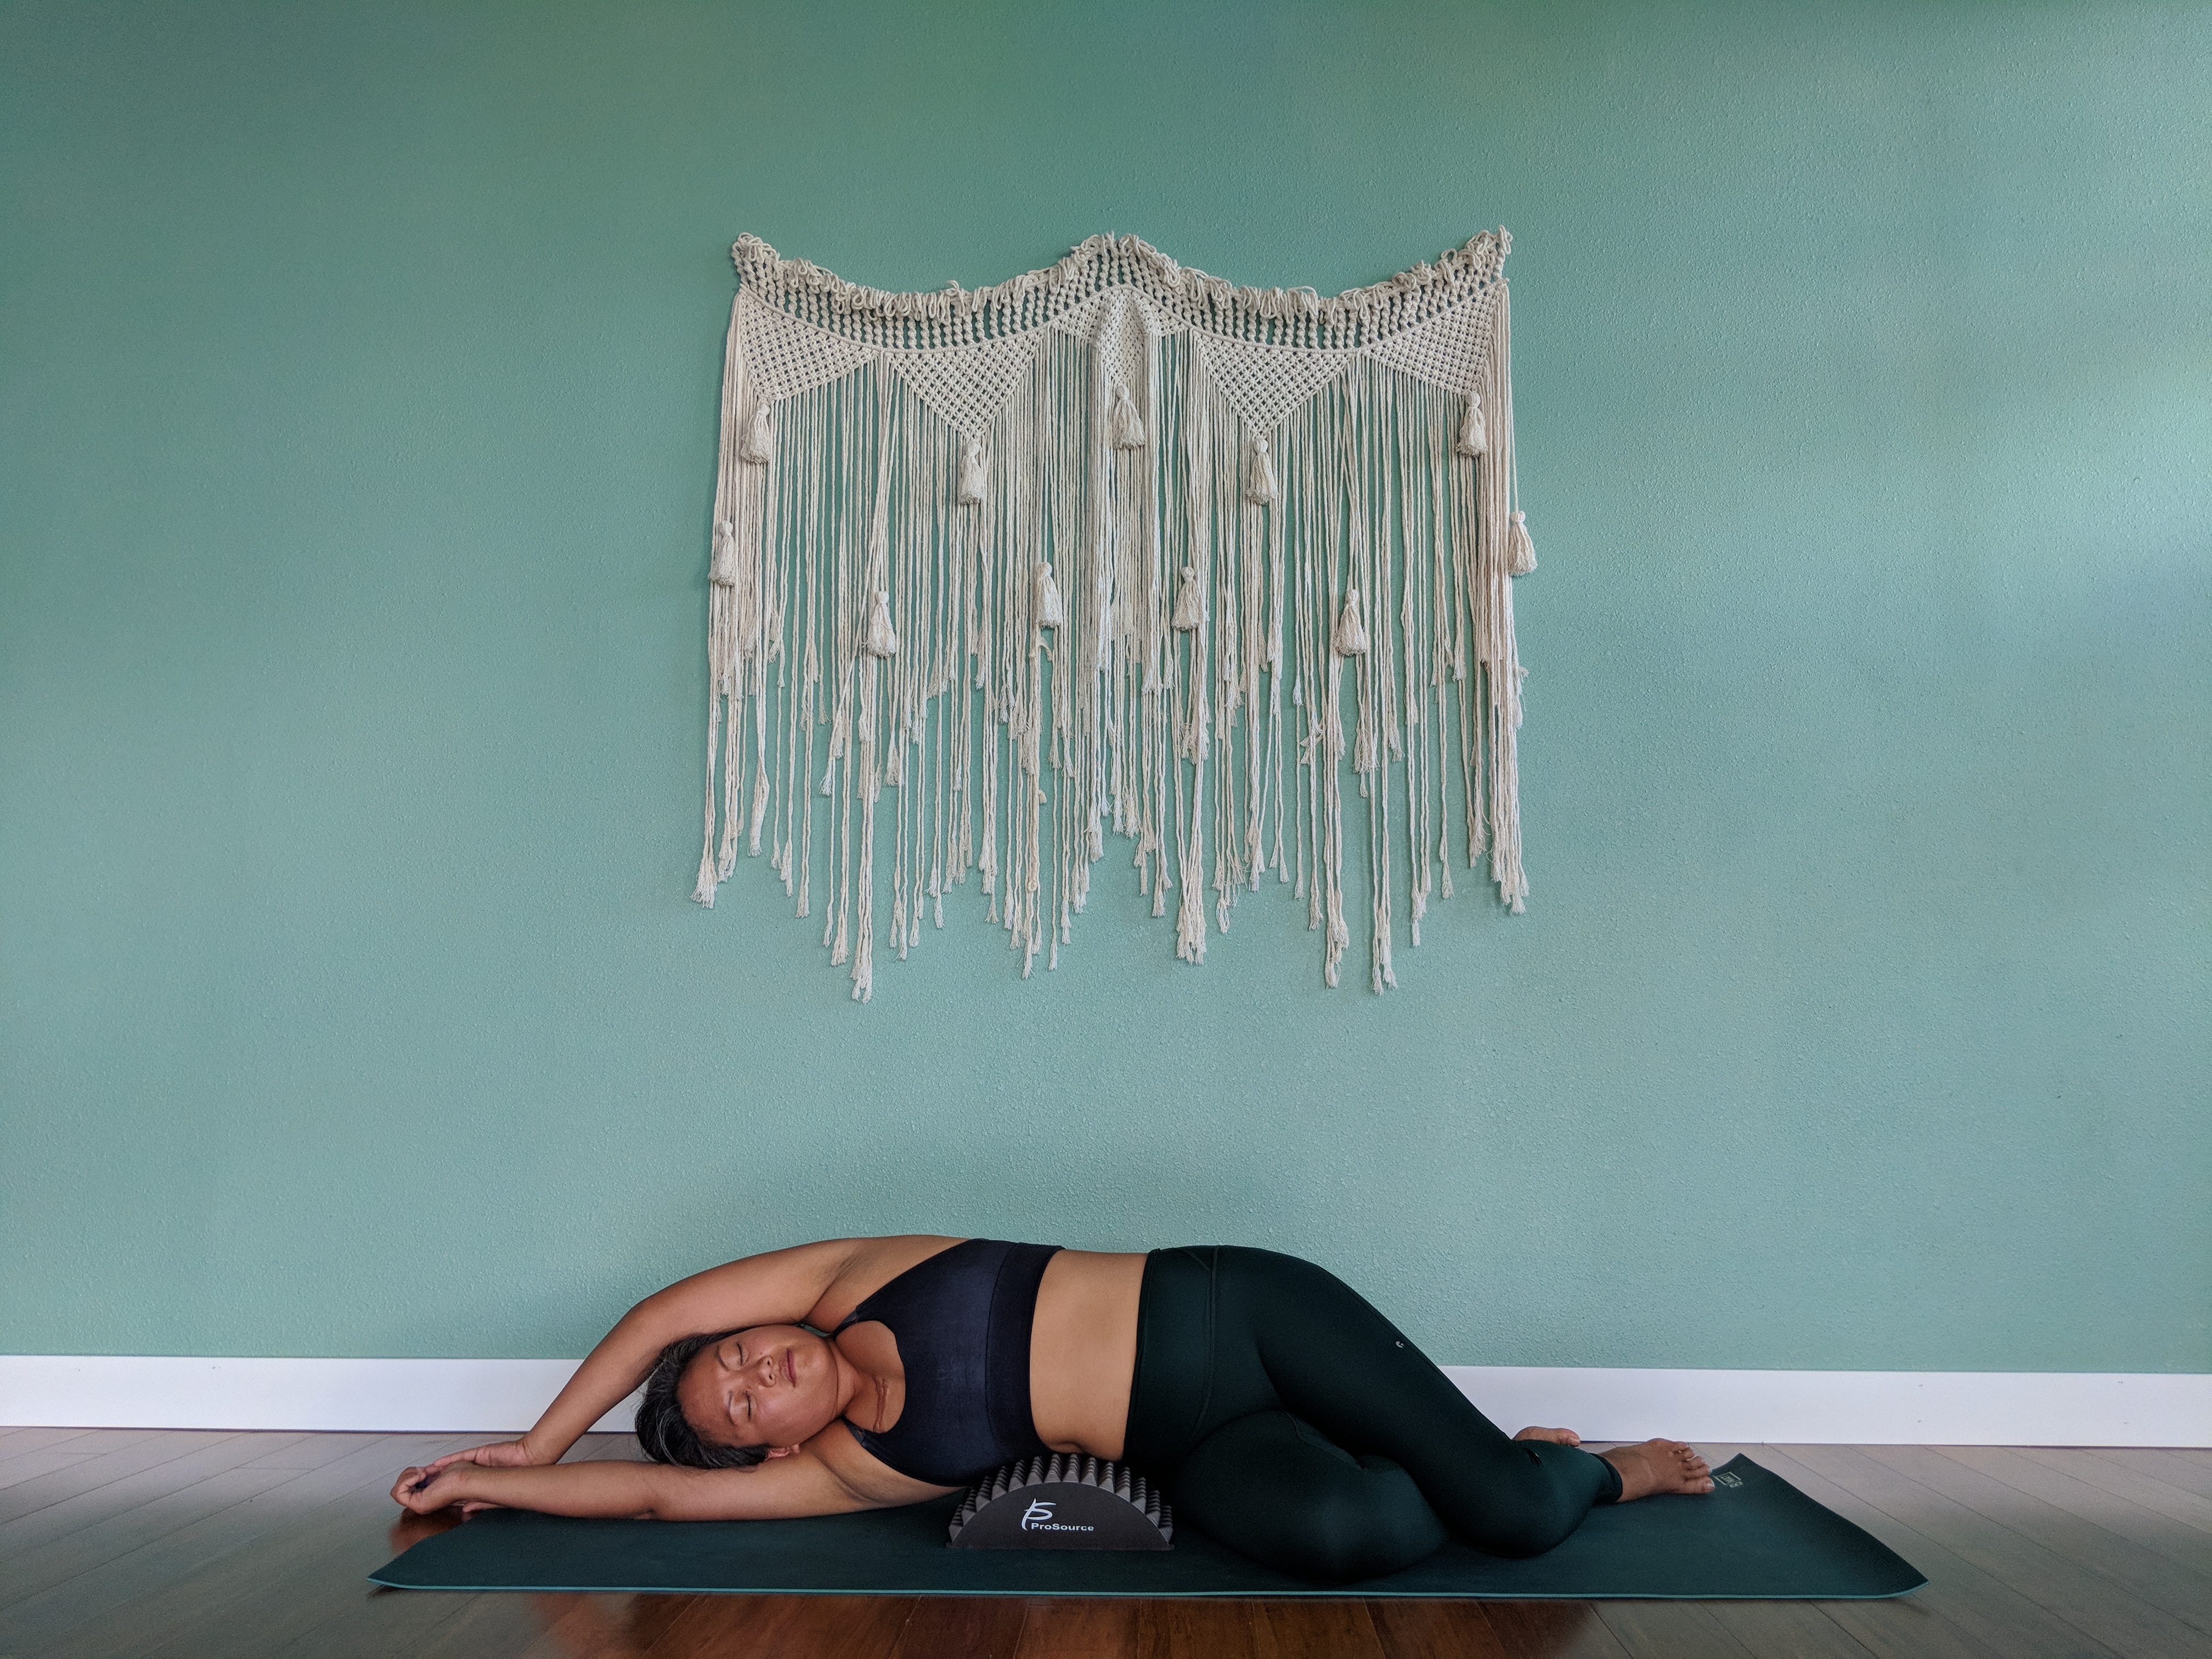
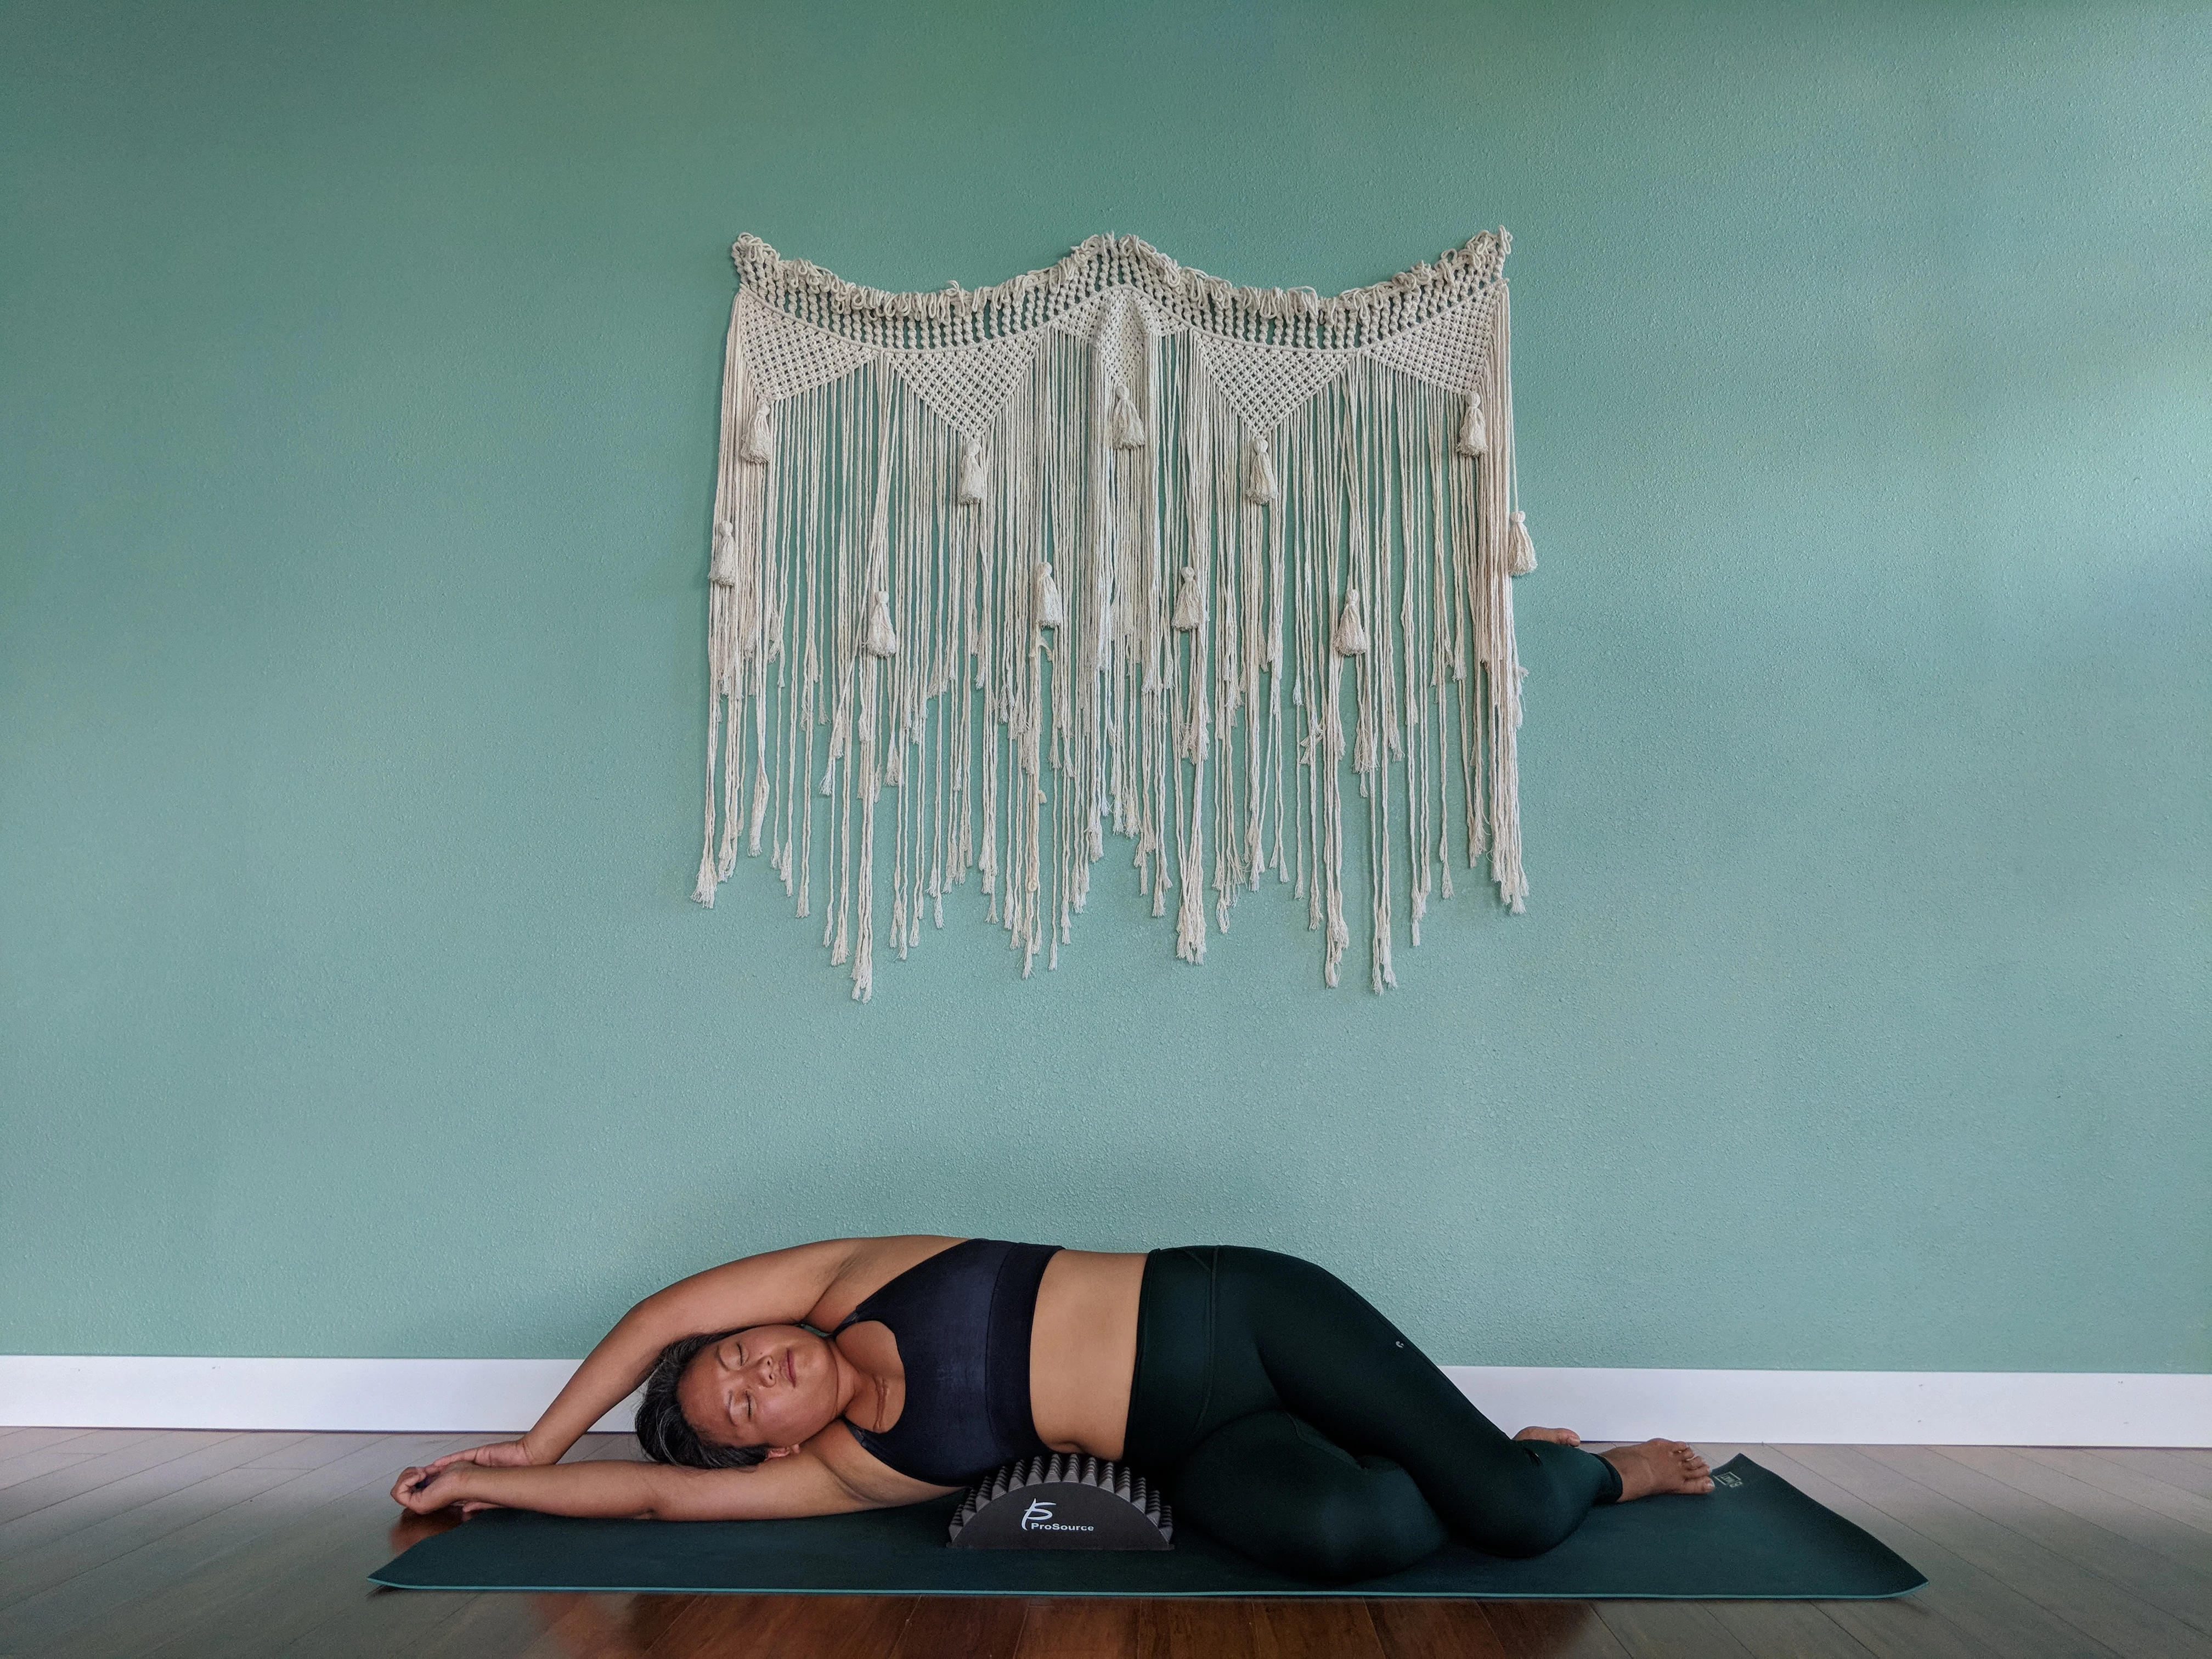
#5 Side Stretching
Side Stretch
Next pose is a side stretch. It’s great for releasing stress around the ribcage, spine and on your internal organs. Just lay on your side with the stretcher next to your waistline. Allow your body to relax as it naturally opens up your mid-section from the side and fans your ribcage towards the ceiling. Stay on one side for 15 breaths and then repeat for another 15 breaths on the opposite side.
#6 Calf Massage
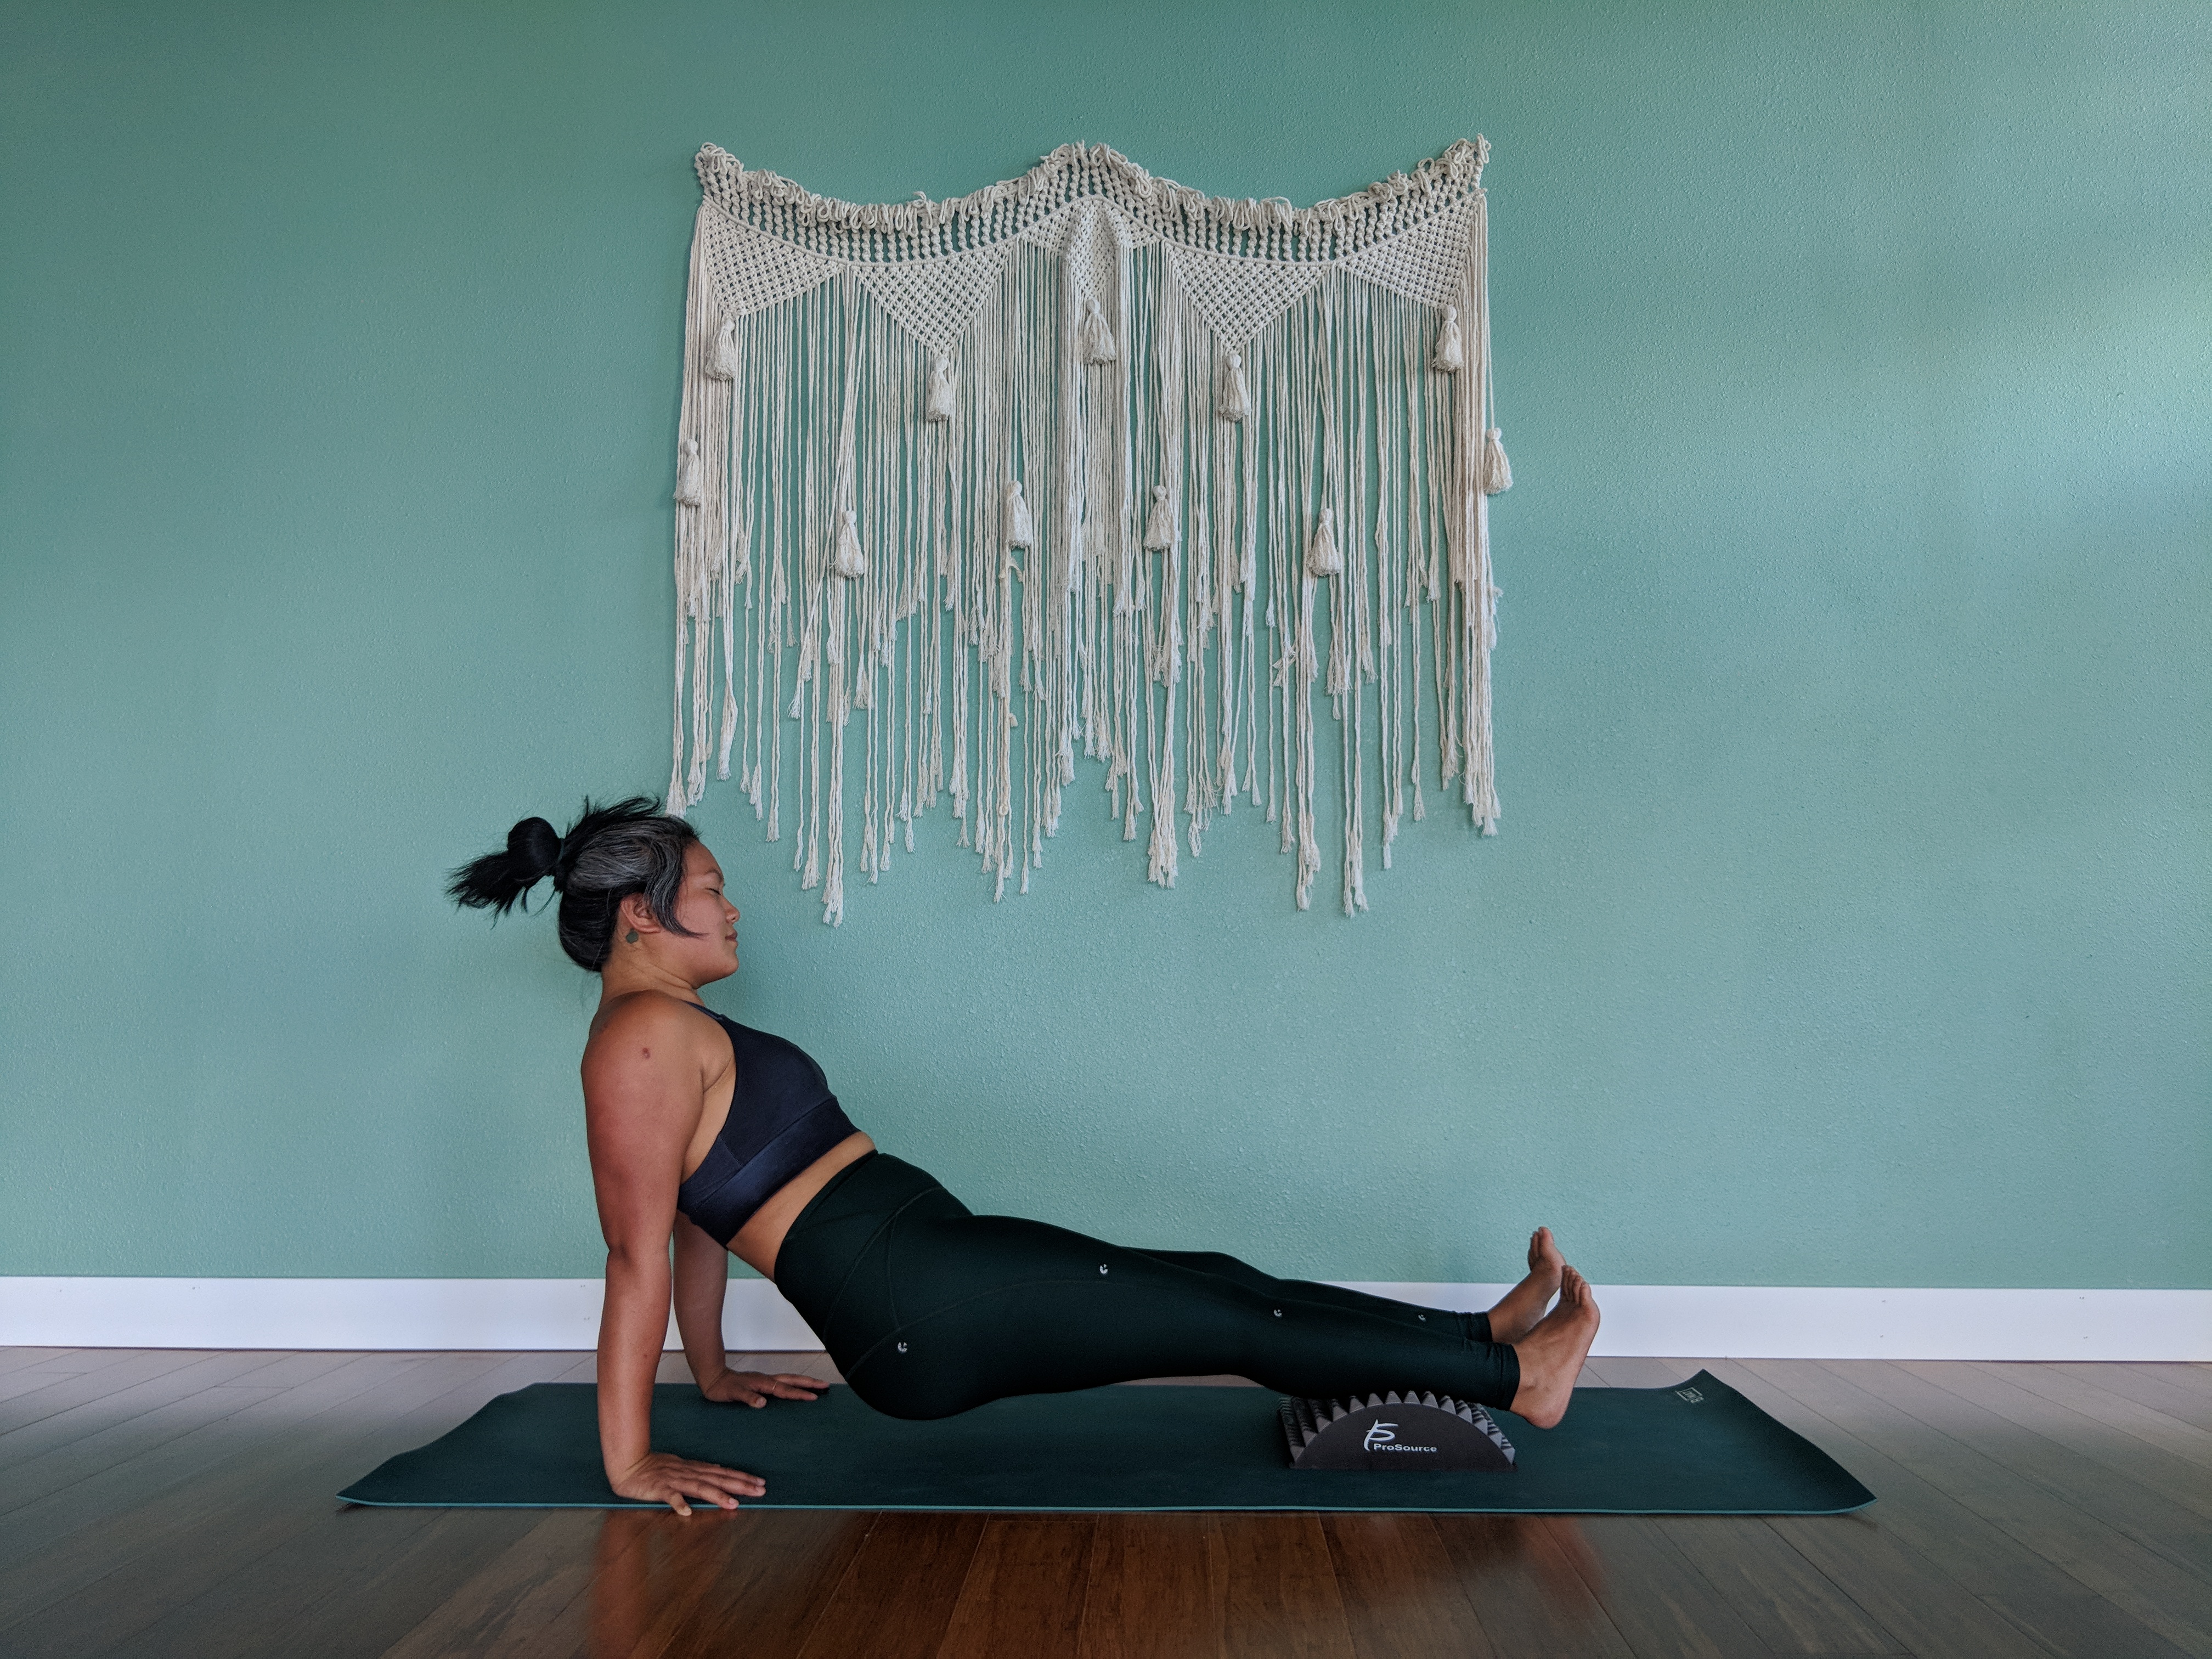

Calf Massage + Arm Strengthening

Calf Massage with Bent Knee
My last pose for y’all is a calf massage. You can go about this two ways, extending both legs and using the strength of core and arms to lift your glutes off the ground. Begin to swing the hips side to side or windshield wipe the toes.
Second option is to bend one leg and place your foot onto the ground. Press through your grounded foot and use it to lift the torso and arms. Swing your hips side to side or windshield wipe your toes to massage your calves. Switch sides after 10-15 breaths.
As your glutes lift, they’ll be putting pressure against the calf muscles. Try to relax your calves as much as possible so that you can really knead the foam spikes into your calf muscles. This will break up any fascia and help release tightness in your calves.
Product Specs
Quick recap of product specs (in case you’re interested).
- Lumbar extension device with 168 fingertip pressure bumps
- Restores the natural curvature of the spine
- Retrains your muscles
- Stimulates proper posture
- Foam tips releases “trigger points” to increase range of motion
- Provides drug free, natural lower back pain relief
- Measurements: 12”L x 11”W x4”H
- Material: EVA foam
I highly recommend the Arched Back Stretcher. It’s a tool that should be in any yogis or fitness practitioners toolkit. I only highlighted a few poses here but there are obviously way more waiting to be discovered by you! Below are my pros and cons for the arched back stretcher.
Pros
- It’s inexpensive. At only $25.99, it provides benefits that are valued more than the product price.
- The tool promises to alleviate back pain, improve posture, and increase flexibility. All the above poses when used with the stretcher has allowed me to experience these benefits in my body.
- The arched design and flexible spikes helps stretch tight muscles and relieve tension.
- Easy to clean. Wipe the stretcher gently with soap and water and a soft cloth, or use antibacterial wipes to disinfect after use.
Cons
- Not easily transportable when traveling long or far distances. The product is lightweight but may be hard to pack due to it’s size. I have one for both my home practice as well as in the office. I use it under my feet as a massagers and for random heart openers throughout the day.
- Spikes are soft. I would prefer firmer spikes for more pressure against my body. I also prefer a firm/hard massage, so the tool may be great for someone who prefers low to medium pressure massages.

 Buy the Arched Back Stretcher here. Use code SCHIMIGGY to get 10% off all your orders at ProSource.
Thank you for visiting today! If you found this encouraging or informative, please connect with us on Instagram or TikTok.


Sign up for our monthly newsletter for updates and more. We promise we won't spam you! Feel free to unsubscribe anytime.
If you're a brand and want to work with us, please visit this page to get in touch.
DISCLAIMER: I’ve partnered with ProsourceFit to provide this tutorial on how to use their Arched Back Stretcher. I received this product complimentary from ProsourceFit, however I am committed to a 100% honest review of this product to my readers.
Updated: 8/6/2018